Monday, October 16, 2006

Winter Gardening

Ok, the title might be a tad bit misleading. I am not suggesting that you actually garden during the winter but you should be using this time to plan your upcoming garden.

As you look out at your yard and garden area during the cold months of winter, let your thoughts run wild and you will be amazed at what images you can conjure up. You might even want to try some of your new found ideas this spring!

1. Pour through garden catalogs, flip the pages and fold down the corner anytime you find something you like. Go back to it often until you decide what new plants and flowers you would like to try this spring.

2. Purchase a gardening book or magazine. Look at what other people are trying in their gardens and see if their ideas inspire you to try something new.

3. Look out your windows and try to visualize how you would like your yard and garden to look like. Study the sun....notice the shady spots.

4. Make a list of what is important to you, in other words, what do you want from your yard and garden? Do you want to create a patio area for entertaining, a vegetable garden so you grow all of your own vegetables, a quiet area for relaxing, or maybe an area that will attract wildlife. Anything is possible but it is important to recognize what you want before you actually start any gardening project. Ultimately, knowing what you want will save time and money!

5. Take lots of notes and draw any ideas you might come up with.(even those ideas that wake you up in the middle of the night!)

6. Of course, visit online nurseries to see what they have to offer. Many sites offer suggestions and interesting gardening articles as well.

Before you know it spring will be here, you will have a shovel in your hand, and you will have a plan! Always Happy Gardening!

About the Author
© 2005, Candee Stark and Flowers & Garden.com
This article is provided courtesy of Flowers and Garden.com - You may freely reprint this article on your website or in your newsletter provided this courtesy notice and the author name and URL remain intact.
Subscribe to our daily Flowers&Garden Blog


More Tips at : Gardening Tips


Friday, October 13, 2006

Wind Chimes Go Great With Gardening

What could be more relaxing than gardening on a nice summer morning? Listening to your wind chime while you garden! Wind chimes are not only fun to look at but they add much more to your garden then just visual appeal.

Wind chimes have tones and vibrations that soothe and calm the mind helping to release all your stress. When you dig in the garden and connect with the earth, listening to your chimes tinkle in the breeze can help you also connect with your inner spirit. Chimes have been used for much more than just decoration for centuries. In fact, wind chimes are used in many Feng Shui cures. You can hang your chimes inside as well as outside, metal chimes are best for North, Northwest and West while wood chimes are best for South, Southeast and East. The number of rods can be associated with the cure you want. Use 4, 6, 7, 8 or 18 rods for luck and 5 rods to reject bad energy. Use bamboo for outside.

Of course, you should pick chimes that decorate your porch or garden area to your liking. There’s plenty of styles and materials to choose from. I favor the chimes with a stained glass decoration on top that comes in all kinds of whimsical styles. If you are more traditional, you might go for a simple bamboo chime with an Asian flair. You can even get chimes that are hand tuned if you are really into the sound quality of your wind chime.

Hanging your wind chimes is easy. To hang from the top of your porch, you can use a simple C shaped hook that screws into the ceiling. Any type hook can be used as long as it is strong enough to support your wind chime. Be sure you hang it in an area where it’s freedom of movement is not obstructed by anything. You can also buy fancy hangers that screw in or that stick up from the ground. When hanging your chime, try to pick a place that will not get a strong wind – this way you can be sure your chime does not blow off and break.

So, the next time that you get out into the garden, make sure that you hang out some wind chimes so that you can add a new level to your gardening experience!


About the Author
Lee Dobbins writes for http://www.wonderful-wind-chimes.com where you can find all kinds of wind chimes to brighten your day. Learn more about the differnt kinds of stained glass chimes at http://www.wonderful-wind-chimes.com/Glass-Chimes.html


More Tips at : Gardening Tips


Tuesday, October 10, 2006

Make The Most Of Fall Gardening

While most gardeners consider spring the most serious planting season, and consider planting season over my mid summer this isn't the case. Now there are many lovely flowers and attractive vegetables that can be planted in late summer to be enjoyed this fall.

One of the perks of fall gardening is the much more tolerable weather, for both you and your plants. The scorching heat and sun of July and August has gone. Plants grown in the fall have much more ideal weather conditions in which to thrive and grow. If you want to extend your gardening season into fall consider planting root vegetables like carrots, radishes and beets. Lettuce and spinach and potatoes do well planted in fall. Also, fall is a good time to take a look around your yard as this is the time of year that some perennials and trees can be planted. Don't forget spring flower bulbs! Now is the time to go through those catalogs you've been receiving and make your order for your show next spring!

Fall is also a time to take stock of your garden for next year. Start with your soil. The back bone of any garden is the soil. It doesn't matter how much you spend on your plants and flowers, if you don't have good soil in your garden they won't thrive and grow well for you.. Your soil needs to be porous and absorb water well. Do you need to add a soil ammender? Do you need to add a fertilizer? It's good to do this on a regular basis as fertilizers encourage and stimulate plant growth. What were your bug problems last year? Before you have loss or damage to your garden next year make sure that you're prepared.

You've seen how your plants have performed this season. What did well and what didn't? Is there a plant that can be moved to a different location where it might fare better? What plants need to be divided? Can you use these new divisions somewhere else in the yard? Fall is the time to walk around your garden and make notes for spring. It's also a good idea for you to make a sketch of the garden itself, noting where each flower is. This way you'll know in spring that what's coming up is a perennial returning, and not a weed to be pulled.
About the Author

This article provided courtesy of http://www.florists-shopper.com

More Tips at : Gardening Tips


Monday, October 09, 2006

Organic Gardening: Going Back To The Basics

Because of an alarming condition of our atmosphere these days and the impact of technological innovations have on our health, everything seems to be resorting to a more viable option - organics. From foods to even hobbies like gardening, organics had definitely taken the limelight.

Nowadays, one of the gradually emerging lucrative activity for hobbyist, and environmentalist for that matter, is organic gardening. It slowly replaces the traditional type of gardening that involves harmful chemicals that speed up the destruction of our Ozone layer.

Organic gardening, basically, refers to one type of gardening that deviates from the customary use of chemicals like fertilizers and pesticides. Because of these, many agriculturists contend that engaging into organics gardening makes one in synchrony with nature.

The basic notion of organics gardening boils down to the fact that it is best to feed the soil and not the plant. Thus, we can hypothetically say that, in organic gardening, it is the soil that needs more nourishment than the plants, or simply because it's from the soil that the plants obtain their nourishment. A healthy soil yields a healthy plant, so to speak.

In organic gardening, the basic concept of "fertilizing" the soil is to use organic materials like composts and manures. When fertilizing the soil, it doesn't necessarily mean that you use fertilizers. In fact, fertilizers were primarily denoted as anything that increases the soil's fertility.


Hence, organic gardening is a way of going back to the basics, the traditional use of basic fertilizers that increases the soil's capability to enrich the plant. In this manner, the grower uses minerals like calcium coming from the fossils of dead animals, nitrogen from legumes or manures, phosphorus from bones of dead animals, and potassium from wood ashes.

On the other hand, organic growers also consider composts of other living things like vegetables or plants when incorporating the idea of organic gardening. Its by-product is known as the humus, which is definitely good for the soil. In organic gardening, humus is an important element in plant production because it contains cellulose that performs like a sponge and retains moisture in the soil so that it will be made available for the plants as they grow.

Moreover, organic gardening incorporates the traditional way of controlling animal pests like physical removal of insects, crop rotation, interplanting, and introduction of prey species. These methods lessen the growth of insects and curb the multiplication of pests. It also impedes the development of diseases that were emphasized by "agribusiness monocropping".

In addition, organic gardening employs the typical suppression of weeds and vegetables pests without having to opt for herbicides. In this organic gardening method of removing weeds, "mulches" are placed on the weeds to prevent them from obtaining the amount of light they need in order to grow. These mulches act as barriers for weeds and vegetable pests. They come in different forms like leaves, stones, wood, or straw.

In general, the technique of organic gardening lies on two agricultural concept: permaculture and biodynamic agriculture.

Permaculture or permanent culture refers to that area in agriculture wherein certain ecological principle, "shared ethics" like earth care and people care, and design tools are used so as to gain sustainable development in plants. On the other hand, biodynamics agriculture is composed of a biological at the same time sustainable system of agricultural assembly.

With these two concepts, we can safely derive the fundamental idea of organic gardening as a system based on environmental, sustainable, and ethical principles of man.

So, we now know for a fact that organic gardening is definitely a lot better than what science and technology teaches us these days.

The only drawback is that it is science that taught us the basic ways on how to care for the environment in the first place, and yet, it is also the same mentor who is teaching us how to employ concepts that eventually leads to nature's destruction. Isn't it ironic?

About the Author: Subscribe to "Gardening Secrets Unearthed" 7-part e-mail course from http://GardeningSecretsAndTips.com! Discover the keys to having a garden a professional landscaper would envy.Source: www.isnare.com

More Tips at : Gardening Tips


Tuesday, October 03, 2006

Rose Gardening In Late Fall

While the growing season is coming to and end, the winter hibernation season has not yet begun. Some of us just don't know what to do with ourselves or our rose bushes during this period of time.

Because your bushes are not yet in hibernation they still require some attention from you. Water continues to be a prime need, so make sure that the soil around their roots continues to remain moist. Give them a good soaking as need be, but, as always, don't over-water. Water is an important part of your roses' winter survival requirements and properly hydrated roots will help them stay protected when the cold weather arrives.

Stop all pruning and deadheading activity so you do not encourage new growth. You should have stopped applying organics last month, and you don't want to apply any more fertilizer now either. Your goal is to keep your roses healthy while, at the same time, encouraging them to begin the process of going into dormancy.

Continue spraying at least once each month to combat black spot. Spider mites are still active during late autumn so keep your eye out for them. Spritz your blooms and foliage with water whenever you see signs of infestation. Aphids are also active now, so have a bottle of soapy water ready to send them packing. Pick off any diseased leaves and rake away any fallen leaves from your rose beds.

This not only improves the appearance of your garden, it also removes any disease residue which may be still on the leaves. This is also a good time to prepare your new rose holes and rose beds for next year's growing season. They will have time to "mellow" over the winter season and will be ready to accept new bushes in spring.

Begin the process of piling mulch around your more delicate varieties such as "St. Patrick", "Color Magic", "Oklahoma" and "Signature". Your hardier varieties can wait until next month. See our "Winter Gardening" article for mulching tips. You worked hard all season to keep your roses healthy and beautiful. If you did everything right, you were probably rewarded with waves and waves of beautiful blooms. Your hard work is almost over for the year, but don't neglect your roses during these important final months.

About the Author
Alice is an avid gardener who shares her resources and experience online at http://www.roseblogonline.com.


Read full story at : Gardening Tips


Tuesday, September 26, 2006

September Gardening Tips

Well it is now September, and the mornings are great aren't they? It is now beginning to be the best time to plant trees and shrubs. It is a great time because the above ground temperatures are dropping and the below ground temps are still warm.

This helps plants get a jump on next spring because the roots still develope in the warm soil while the tops slow down in growth. Also, there are less winds and typically more moisture during this time of year, which of course reduces stress on newly planted shrubs and trees. You should be able to plant just about anything, including pansies, (which will last thru next May) mums, winter veggies (starts), most trees and shrubs.

There are a few exceptions: Palm trees might be better planted in the spring and summer, in order to get a good root establishment before the winter sets in. (For the lower elevations of the southwestern U.S. States)
Oleanders may experience some winter kill if planted too late in the season, especially the 1 gallon size. The larger sizes seem to suffer the least winter kill. This is usually for the the first winter, after that they will have even less winter or no winter kill as they age. Using a winterizer fertilizer with plenty of potash will help increase winter hardiness just about all shrubs and trees.

It is recommended for valuable plants that may suffer from winter damage. Use this product before October 30th. Don't forget to use compost, peat moss, or soil builder and root stimulator on all plantings, and make sure plants have adequate water.

About the Author
Gary Guzman Owner of Guzman's Greenhouse and Color your world Nurseries.

Website: http://guzmansgreenhouse.com

email: manager@guzmansgreenhouse.com


More Tips at : Gardening Tips


Wednesday, September 20, 2006

Gardening Tips

Gardens come in different varieties like the plants you find in them. There are several gardening tips that can be used for all type of gardens.

1.Mulching protects your garden topsoil from being blown away. It also provides nutrients as it decomposes and improves the appearance of your gardens. Mulching has other benefits and is one of the most recommended gardening tips by gardeners and farmers alike.

2.Healthy plants are more disease resistant. Plants are like people.

3.Landscaping is a good investment which can double the value of your home. This is one gardening tip that can earn you money.

4. Growing grass on bare ground is an easy way to make your home look better and appreciate in value. This is one gardening tip that promotes earning money while growing grass legally.

5. Aside from looking great in your home, trees also provide some sort of protection from direct sunlight exposure and strong winds.

6. Vines on the walls, fences and overhead structures also would offer some protection and would also look great.

7.Flowers are beautiful, but they are also expensive. Get one that is resistant to many elements. Flowers from your local community already have developed resistance to conditions present in your area.

8.For most gardens plants, their roots go only as deep as 6 inches. Putting fertilizer deeper than that would be a waste of money. Put them shallower as they seep down when the plants are being watered.

9.Earthworms are important to plants. They till and aerate the soil for the roots to breathe. Non-organic fertilizers can kill them. This gardening tip dates back to the old days of gardening.

10. Having several kinds of insects that are beneficial to your garden would be good. These insects can be encouraged to stay by having diverse plants in your garden.

11. Spot spraying weeds with household vinegar, instead of using commercial weed-killers, can eradicate them. This is another environment friendly gardening tip.

12. Avoid putting too much mulch on tree trunks; this would encourage unwanted pests to reside on them.

13. Use plant varieties that are common to your area or have been taken from an area with similar conditions.

14. Be sure to know the plants that are poisonous. If you are intent on growing them, make sure to have the necessary cure available in your household. Take note of this gardening tip, it can save your life.

15. The best time to water plants is during mornings.

16. Before planting a new plant in your garden, you must consider its height and size when it matures. This garden tip can help you save money in the future.

17. Newly transplanted plants may require special attention during its first week. This is to reduce the stress and shock it got during transplantation.

And last but not the least of the gardening tips...

18.Plants are living entities. If you want them to grow in your garden you have to treat them as such. They need to be taken care of. They are like your pets, you look out for them. In return you get that feeling of contentment watching them thrive.

A good way to take care of them is to consider that plants might have some feelings too.

About the author:
Hege Crowton is an expert copywriter.
She is known for doing in-depth research before writing her articles.
Many of her articles are posted on www.submitcontent.com
and she also does a lot of writing for www.CrowSites.com

Copyright 2005 www.Gardeningcrow.com


More Tips at : Gardening Tips


Thursday, September 14, 2006

Gardening Fun With Children

Do you recall your very first plant? Your first garden? Perhaps it was the geranium seeds you planted in a milk carton or Styrofoam cup as part of a class project. Perhaps, if you were lucky, it was your own corner of your parent’s garden, staked out and set up just for the plants that you chose. My own garden memories include experiments with watermelon seeds (under the back porch where no one would step on them – and where, with no sun, they never grew), orange seeds (the ones in the garden never sprouted. The one I started in a paper cup on a window sill still grows in my mother’s back yard) and packets of all sorts of flower seeds.


Instilling a love of gardening in children gives them a lifelong gift on which they can draw – for pleasure, for sustenance and to add creativity and joy to their lives. There are so many garden-related activities and experiments that you can do with a garden. It boggles the mind that so many resources and references to gardening with children concentrate on ‘building a sunflower house’ when there are so many more creative ways to introduce children to the pure fun of gardening.

Packets of seeds that are labeled ‘kid gardens’ are one way to go about it – they do usually contain seeds for plants that grow quickly, at least in grownup terms. For a child, though, ten days is an eternity. Instead, take a trip to the local nursery with your child and let them pick one or two flats of flowers already in bloom. Invest a few dollars in a garden trowel and fork, and help your child transplant the seedlings into his own flower bed. That’s the sort of work/reward ratio that a child understands: one afternoon of digging and planting equals a flower garden. As the weeks go on, you’ll find their interest is maintained because they’re into the FUN part of gardening – watering, picking, and enjoying.

When they’re ready to start from seed, include them in early spring seed starting. Instead of buying plants, let them plant them inside to be ready to transplant in a few weeks. Take a tip from science teachers everywhere – plant several flats in regular trays, but plant one very special ‘demonstrator’. Fill a glass with soil, poke seeds down into the dirt against the side of the glass and put it on a sunny windowsill. Your child will have the fascination of watching what happens underground as his seedlings grow – the seed pod splitting, the roots spreading, and finally, the miracle of the first tiny shoots pressing upward toward the light and heat.

There are other very easy gardening projects that yield quick results for children, projects that have the bonus of being ‘winter-ready’. Cut up a potato, making sure that each chunk contains at least one eye. Plant it in a cup of dirt with the eye facing up – and watch it grow. You can do the same with an onion – just bury the onion in soil with the crown showing. It will only take days for the shoots to turn green and begin growing.

For more fun gardening ideas for kids, pick up a science activity book. You’ll find a world of growing and gardening experiments that children can try, including the ever popular ‘cucumber in a bottle’ trick.

About the Author

This article courtesy of http://www.floral-world.net


More Tips at : Gardening Tips


Monday, September 11, 2006

Gardening for Kids

Children are continually bombarded with advertising for fast food and unhealthy treats. One of the most important lessons you can teach them is how to tend and grow their own food from the garden.

There are plenty of quick and easy projects that the children can get involved in. The projects will teach them about nutrition, nature, recycling and organic gardening. That's a good outcome!


The no dig garden is a particularly good project for children because the garden can be built and planted in just a couple of hours. You do not have to prepare the garden for weeks in advance, as with other growing methods. There are detailed instructions for building a no dig garden on my website (www.no-dig-vegetablegarden.com). If a full on garden seems too ambitious at the start, try something simpler.

  • Growing bean shoots is the quickest way to grow edible things. In just a few days, the kids will be able to pop fresh bean shoots in a salad or sandwich or just eat them as they come. This will also work with alfalfa, cress and snow pea seeds. Put the seeds into a clean, wide mouth jar and place a mesh material over the mouth. It must be a material that water and air can pass through, but not the seeds. A bit of discarded pantyhose secured with a rubber band will do. Soak the seeds overnight in water. Next morning, drain the excess water and place the jar on its side in a bright room, near a window. A couple of times a day, re-wet the seeds, drain and return to the bright space. The seeds will sprout and grow very quickly and within a few days will be ready to eat.


  • To propagate your own garden seedlings build this portable greenhouse! Wash a 2Lt plastic bottle (soft drink or soda water type) and using a knife or sharp scissors, cut it in half along one side. Force it open and fill one side with good quality potting mix. Plant your seeds and water gently. A very light mixture of water and liquid fertilizer will kick start the seeds. Close the bottle back up and seal with tape. Place the bottle in a sunny position. Your seedlings should be well on their way and ready for repotting in 2-4 weeks.


  • Do you know very young children? Introduce them to Hairy Harry! Take one of those pairless socks every household has and sew on some eyes and other facial features. Put some lawn seed in the sock end and fill with garden soil, potting mix or compost. Fill the sock until the face is filled out and tie a knot in the sock, making sure the mix inside is packed tightly. Water the sock regularly, or prop it on top of a container with water. The loose end of the sock will act as a wick to draw up the moisture. Place in a sunny position. In a couple of days, Harry will have a full head of green hair! In a couple of weeks, he will be ready for a hair cut or styling makeover!


  • Children love eating things fresh from a garden. For convenience, you might want to plant close to the kitchen where the children can harvest items under your watchful eye. So consider doing quick growing plants in containers. Cress, radishes and lettuce will be ready the quickest in 6-8 weeks. Next in line are dwarf beans, cucumber, cabbage, tomatoes and onion which will be ready in 8-12 weeks. Most others, including the popular carrots and potatoes will need 16-20 weeks to mature. You could be harvesting from this little garden for months!


  • Encourage your children to nurture their little garden, which ever project you choose. It's a great way to teach them practical skills and fill them forever with the wonder of nature.


    About the Author

    Judy Williams (www.no-dig-vegetablegarden.com) aspires to become a fulltime earth mother goddess. This site acts as a primer for all vegetable gardening aspects covering topics like how to build a garden, nurture seedlings, container gardening and composting.


    More Tips at : Gardening Tips


    Wednesday, August 30, 2006

    Gardening For Senior Citizens

    Are you in a wheelchair, and long to dig in the dirt and create flowering beauty and grow far more zucchini than you can give away? Or are your knees just starting to age and even though you've loved gardening all your life, you're having more trouble getting up and down and are afraid you'll have to give up gardening altogether? Did you botch the last pruning of your roses because of the worsening arthritis in your hands?
    Welcome to the world of the physically challenged gardener.

    Don't despair. Adapt!


    There's plenty of help out there in the form of advice, tools, raised flower beds and other specialized equipment.A Google search of "Disabled gardening tools" leads to 125 websites with specific helpful adaptive equipment. "Disabled gardening" gives a whopping 873,000 results where you can find advice and "handicapped gardening" yields 111,000. Let those arthritic fingers do your walking!

    Problem: "The ground is just too far down there!"

    Think about doing your gardening while sitting on a chair, instead of on the ground, squatting or bending over. The most obvious solution is to build raised flower beds and scatter containers throughout your garden area. Buy cheap plastic outdoor chairs and place one beside each mini-garden so you don't have to drag or carry when it's time to weed. You can just sit down and enjoy the feel of moist earth beneath your fingers and breathe in the heavenly smell of freshly applied fish emulsion.

    If you hang a cup holder on the edge of your container, you can even have the luxury of tea or coffee with your weeds. Maybe the fish emulsion should wait.

    Don't think about what you've lost now that you can't crawl around weeding the perennial border; teach your grandchild or a neighborhood kid the joy to be found doing that task ... you've just discovered a new adventure in gardening. The good news is that you may find whole different special areas of your yard where you can stick a mini-garden.

    Get creative. Put a beautiful container near your front door and plant wonderfully scented flowers to greet your guests ... or perhaps a nice cherry tomato plant they can steal from on their way to ring your doorbell. Put a waist high herb garden right outside your kitchen door and add an area in it for your favorite cut flowers.

    When you're deciding where to locate the raised bed or container, be sure to remember physically demanding practicalities like dragging a heavy hose to water it. Think and plan a low energy solution for what you'll do with the compost material.

    Problem: "My painful hands don't have the strength for ..."

    You can get tools which extend your arms to reach the ground level flower bed from a sitting position. Several manufacturers make specially tools with light weight handles designed to keep the wrist and hand in a stress-free position and to provide a firmer grip. Small, light rakes, hoes, etc. like this can work wonders.

    Think ratchet pruner, rachet lopping shears ... let the laws of physics give your hands a hand. You'll be amazed when you look at the tools available. Pull difficult weeds by stepping on a lever.

    Problem: "I get so tired so quickly."

    Hey, the weeds didn't grow all at once; you don't have to pull them all at once. Pace yourself. Find ways to make gardening something you do while you sit and drink a cup of tea and listen to the birds, rather than a work chore you slave away at for a full afternoon. Pull one weed from the scented garden near your front door on your way out and another weed on the way in. Plant parsley in your kitchen door herb garden while your toast is toasting and the coffee is dripping.

    Buy and plant 3 packs of flowers instead of a whole flat. Take a nice aerobic walk around your yard, stopping at a different container for 5 minutes "conversation" with your plants on each cycle, then go back inside and plop on the recliner. You'll be amazed at how much gets done in these mini-work sessions. Your heart will love you, too.

    Remember, one of the nice things about flowers is they don't have anything to prove. We can all learn a lesson from them.

    About the Author

    This article provided courtesy of http://www.floral-shopper.com


    More Tips at : Gardening Tips


    Thursday, August 24, 2006

    Enjoy Working Your Garden With The Right Gardening Tool

    Nearly every gardener has some type of gardening tools. In fact, it is nearly impossible to have a garden without the necessary garden tools. What kind of gardening equipment you use will obviously depend on the size and extent of your garden, what you are able to handle, if you want to spend a lot of time in your garden or get it done quickly, and finally, how much money you are willing to spend.

    While many gardeners do not have expensive or high-tech gardening tools, all of them have some type of gardening equipment for cultivating. Tools for cultivating can include both hand held tools and power tools. What kind you buy depends on how serious of a gardener you are. Hand tools include your everyday items like shovels, spading forks, rakes, trowels, and diggers. These can all be used to get a garden ready for planting and are relatively easy and do not require much strength to use. Other tools include a wheel cultivator, pickax, and mattock.

    While power tools are a little more expensive than hand tools, they really cut down on the hard labor. The most essential piece of gardening equipment is undoubtedly the tiller. The tiller will break up the ground and get it ready for planting, chop up any debris, and help mix in fertilizer and compost. If you do not want to spend the money on a tiller, you can hire someone or rent a tiller. Other power tools that are very popular include chippers and garden shredders.

    If you have shrubs, hedges, or small trees in your yard, pruning tools are a vital piece of gardening equipment. Pruning shears are good for branches about ¾” in diameter, while lopping shears can handle branches from a half inch up to about 2 inches. Pole pruners are on a pole and can reach branches about 15 feet above ground. Hedge shears and pruning saws are both larger, more heavy-duty pruning tools for the serious gardener.

    Since your plants must be watered in order to survive, and lets face it, it doesn't rain whenever we want it to, gardening equipment for watering is a must have. The one thing you cannot get along without is a water hose, everything after that is optional. Many gardeners use sprinklers or drip irrigation hose. There are even timers you can purchase for sprinklers or drip hoses, if you are willing to drop the extra cash.

    Gardening without gardening tools would be a nightmare. Sure there are some people who enjoy getting a little dirty while they plant their flowers, but even those types of people have the most basic of gardening tools, like a rake or a hoe. Gardening equipment is a part of gardening, as important as the dirt and the seeds.


    About the Author: For more information about garden tools, visit http://www.gardentoolinfocenter.com
    More Tips at : Gardening Tips


    Monday, May 22, 2006

    Herb Gardening Indoors

    Here are some tips for herb gardening indoors that will simulate the conditions in an outside garden. For Herb gardening indoors the growing climates need to be pretty much the same as the conditions outside.

    Get your herb plants from a good garden center nursery who will have plenty of garden advice to help you with your inside garden. You will need some garden equipment like a small digging garden tool, garden gloves, organic fertilizer and some small gardening containers. You probably already have most of these garden supplies in your garden shed.Soil is the most important aspect of growing herbs indoors.
    Use only top grade potting soil with an organic fertilizer mixed in. If you think it is too fine a soil, use a little perlite. Fertilize while potting the herbs and they should be happy until spring. If you have an herb that is not growing vigorously add a little organic liquid fertilizer to the water. When you go to transplant the herb, go one inch up in the size of the gardening container. If the plant is in a two inch pot, go to a three inch gardening container. Leave the roots alone and be careful not to bruise the stem.
    Don't plant oreganos, mints, lemon balm or bee balm with other plants because they will overgrow everything. Pot these herbs in a garden container all their own. Some people swear that you must put garden stones in the bottom of the gardening container, but I dispute that opinion. I feel that the garden stones take valuable space away from the herb roots.When it comes to light, all herbs must get 4 to 6 hours of sunlight a day on your window sill. If your window doesn't supply that much light then purchase garden grow lights and hang them three inches above the plants. If you live in a very hot climate shade the herbs during the hottest periods.
    If you live in a very cold climate keep the herbs away from the cold glass panes.When it comes to watering, don't let the herbs dry out but don't drown them either. An inexpensive water meter from your garden center nursery will help with this important step in growing your herbs. Always use room temperature water so as not to shock the herb's roots.If you follow all of these steps you will have a healthy herb garden all winter.This article may be distributed freely on your website, in your ezines and in your eBooks, as long as this entire article, copyright notice, links and the resource box are unchanged. Copyright � 2005 Mary Hanna. All Rights reserved.

    About the Author: Mary Hanna is an aspiring herbalist who lives full time in Central Florida which allows her to garden and grow herbs inside and outside year round.
    Herb Gardening Indoors By Mary Hanna
    Copyright 2005 Contact: mary@gardeninglandscapingtips.com or visit her garden site http://www.gardeninglandscapingtips.com/

    This article was taken from : http://gardeningtips.infoplugin.com


    Monday, May 15, 2006

    A Little Known Secret to Successful Outdoor Gardening

    Leonard Mutch

    A Little Known Secret to Successful Outdoor Gardening ......Pruning

    Outdoor gardening is so much easier when you know how.
    Outdoor gardening is much more enjoyable when you know a few secrets.

    Much of the enjoyment of outdoor gardening comes from the care and proper maintenance of the garden..

    Not many plants will look their best without some help, and pruning is one of these techniques considered essential to outdoor gardening if plants are to flower and fruit well, and to keep pests and diseases at bay.

    For those inexperienced in outdoor gardening, pruning can often be a reason for concern.
    Questions may arise, such as when is the best time to prune, and how, and where.

    We prune our trees and shrubs mainly to increase flowering and fruiting, to control diseases, or to change the size or shape of the plant.

    Some shrubs such as Forsythia need an annual prune of their older wood to help maintain vigor and to produce new flowering shoots.
    These new shoots are produced from the base of the plant.
    If Forsythia was left un pruned it could soon become overcrowded, allowing little room for new shoots to grow and flower.
    I recommend that after flowering each year you cut out a good quarter to one third of the old wood around the base of the shrub.

    A number of shrubs can be encouraged through pruning to develop larger foliage with no flowers.
    This is usually done in late winter or early spring.
    The shrub is either cut back to the ground, or cut back very hard whilst removing dead wood and twigs.

    Some trees are suitable for this type of pruning, and this can totally change the appearance of these plants.

    Ornamental fruit trees will produce much more flowers and fruit when pruned correctly.
    As a rough guide for outdoor gardening the plants that flower early in the season should be pruned as soon as flowering has finished,whilst late flowering shrubs can be done at the beginning of the growing season.

    Many shrubs are grown for the color of their stems, and will need to be pruned at frequent intervals if the color is to be kept.
    A technique called "coppicing" where the shrub is pruned hard close to the ground is usually involved.

    Coppicing is also used for the production of wood suitable for fencing.
    In outdoor gardening however, it is used most often to stimulate fresh new growth in the colorful stems of trees and shrubs.
    The shape of trees and shrubs in the outdoor garden can be changed by pruning and crossing branches that are close together.
    The object here is to construct a natural open shape so that air can circulate freely.

    If some of your older shrubs are getting a bit woody and ugly you could try cutting the plant back hard whilst trying to keep some leaves on the lower branches, before deciding to pull them up.
    It's worth giving the plant a feed and mulch at this time too.

    What pruning tools will you need for outdoor gardening?

    For outdoor gardening you will need secateurs for soft shoots and small branches, or loppers for branches that are too thick to be cut with secateurs, and a saw for even bigger branches.
    Always use good quality tools and make sure they are sharp.

    It is essential to the health of your plants that you prune correctly.
    Cut out all diseased, weak and dead growth.
    Always cut back to healthy wood, free from the staining of infected tissue.
    Generally when pruning cuts are made on trees and shrubs it should be made to a bud, which will then grow away without leaving a dead stump.
    You should choose a bud that is facing the direction you want the branch to grow away to, then make a slanting cut about 2 inches above the bud.
    If the plant has opposing buds, then cut straight across.

    A good tip for creating cleaner, easier cuts on lighter stems and branches with secateurs is to hold the stem in your free hand and bend it slightly with light pressure before cutting.
    To remove a branch from a shrub or tree, you first need to cut the branch back to about a foot from the trunk. This will help to prevent the branch tearing.
    Don't however cut the remaining stub flush with the trunk, but leave a small swelling which can heal on its own.
    Pare off ragged parts left on sawn surfaces.

    Collect all your prunings and compost them if soft and healthy, but burn them if woody or diseased.

    Enjoy your outdoor gardening by pruning successfully.
    Make the right cut to improve your outdoor gardening skills.


    About the Author

    Leonard Mutch makes it easy to improve your gardening skills. Subscribe now to his monthly newsletter for tips and savings. Visit this site:
    http://www.gardenandplantcenter.com


    This acticles was taken from : http://gardeningtips.infoplugin.com


    Purple with a little white

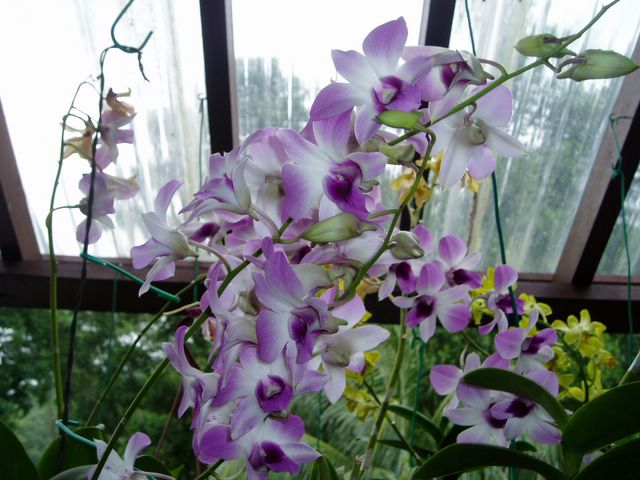
    White with light purple

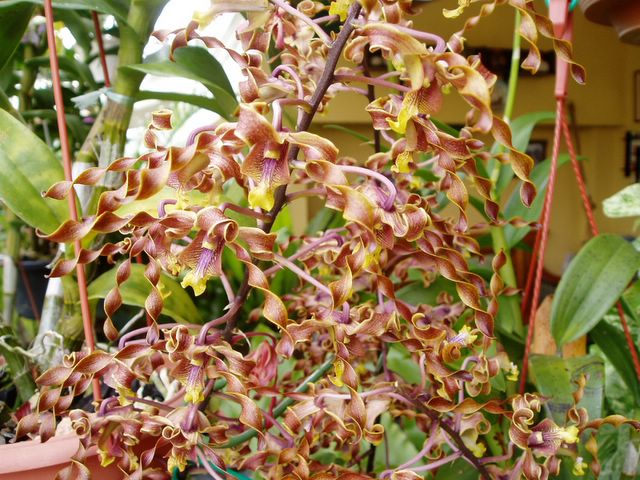
    Still wandering what species this was

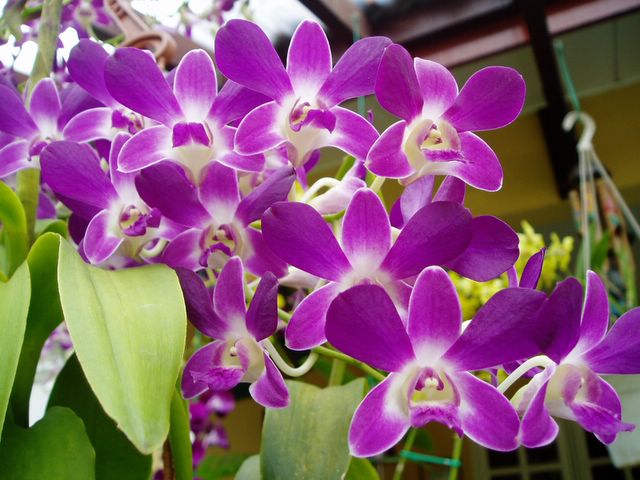
    Purple with white


    Purple with middle white