Potatoes, taters, spuds…call them what you will, potatoes are a staple in the diet of many people all over the planet. Potatoes are a nutritious, versatile vegetable, and they’re incredibly easy to grow. But before you run out to the garden with your shovel and hoe, there are a few things you should know about planting potatoes.
You may have heard old timers say that potatoes should always be planted on Good Friday. This old wives’ tale is absolutely absurd. Good Friday does not fall on the same calendar date each year and can fall anywhere from early March to mid April. If folks in New England or the upper Midwest tried to plant potatoes on Good Friday, many years they’d be digging through rock-hard soil that was still frozen solid.
Do not plant potatoes too early, while the ground is still icy. If the ground is too cold and wet, the seed potatoes will delay sprouting until the growing conditions are more favorable. This is usually in early March to late April, depending on the climate. Potatoes do tolerate cool soil and a light frost, but not much growth will take place until the soil warms up a bit.
Read Full Article HERE : Let’s Plant Potatoes in the Garden
Monday, November 20, 2006


Thursday, November 16, 2006
Things You Should Know About Gardening
Gardens come in different varieties like the plants you find in them. There are several gardening tips that can be used for all type of gardens.
1.Mulching protects your garden topsoil from being blown away. It also provides nutrients as it decomposes and improves the appearance of your gardens. Mulching has other benefits and is one of the most recommended gardening tips by gardeners and farmers alike.
2.Healthy plants are more disease resistant. Plant are like people, a person with a strong immune system can combat diseases. A healthy plant does the same.
3. Pests can be eradicated by cleaning the plant with a watery solution of soap. Just make sure to rinse after. This gardening tip is best heeded for fruit bearing trees or edible plants.
4. Using compost fertilizers are a great way to have healthy plants. It is also a great way to save money on expensive fertilizers. Non -organic fertilizers also tend to leave chemical residues that can accumulate in garden soils and harm not only the plants but the gardeners as well. They cause toxins to go to the water supplies. Another gardening tip recommended not just by farmers and gardeners but also by environmentalists.
5. There are several plants that are only suitable for a specified climate, a certain kind of soil or can only grow with certain plants. You have to know what plant grow in the conditions you have in your area this is for you to avoid unnecessary purchases. This is a money saving gardening tip.
6.Landscaping is a good investment which can double the value of your home. This is one gardening tip that can earn you money.
7. Growing grass on bare ground is an easy way to make your home look better and appreciate in value. This is one gardening tip that promotes earning money while growing grass legally.
8. Aside from looking great in your home, trees also provide some sort of protection from direct sunlight exposure and strong winds.
9. Vines on the walls, fences and overhead structures also would offer some protection and would also look great.
10.Flowers are beautiful, but they are also expensive. Get one that is resistant to many elements. Flowers from your local community already have developed resistance to conditions present in your area.
11.For most gardens plants, their roots go only as deep as 6 inches. Putting fertilizer deeper than that would be a waste of money. Put them shallower as they seep down when the plants are being watered.
12.Earthworms are important to plants. They till and aerate the soil for the roots to breathe. Non-organic fertilizers can kill them. This gardening tip dates back to the old days of gardening.
13. Having several kinds of insects that are beneficial to your garden would be good. These insects can be encouraged to stay by having diverse plants in your garden.
14. Spot spraying weeds with household vinegar, instead of using commercial weed-killers, can eradicate them. This is another environment friendly gardening tip.
15. Avoid putting too much mulch on tree trunks, this would encourage unwanted pests to reside on them.
16. Use plant varieties that are common to your area or have been taken from an area with similar conditions.
17. Be sure to know the plants that are poisonous. If you are intent on growing them, make sure to have the necessary cure available in your household. Take note of this gardening tip, it can save your life.
18. The best time to water plants is during mornings.
19. Before planting a new plant in your garden, you must consider its height and size when it matures. This garden tip can help you save money in the future.
20. Newly transplanted plants may require special attention during its first week. This is to reduce the stress and shock it got during transplantation.
And last but not the least of the gardening tips...
21.Plants are living entities. If you want them to grow in your garden you have to treat them as such. They need to be taken care of. They are like your pets, you look out for them. In return you get that feeling of contentment watching them thrive.
A good way to take care of them is to consider that plants might have some feelings too.
About The Author
Gerardas Norkus
Subscribe to "Gardening Secrets Unearthed" 7-part e-mail course from http://GardeningSecretsAndTips.com! Discover the keys to having a garden a professional landscaper would envy.
More Tips at : Gardening Tips
Tips for Preparing a Planting Bed
f you are preparing beds for landscaping around your house this article shouldsimplify the process for you. I say that because of everything that is written about this subject, some of it is accurate, some of it is just plain wrong, and much of it is much more complicated than it needs to be. I like to think of myself as Simple Simon. I find the easiest, yet most effective way to do things, and they work.
Let’s assume that the area where you are planning your bed is now planted in grass. How do you get rid of the grass? Chemicals or no chemicals? Chemicals are easy, so we’ll look at the chemical method first.
My favorite chemical for killing grass and weeds is RoundUp, and used properly it is effective. Rule number one: Read the label on the package, and mix the chemical exactly as recommended by the manufacture. Rule number two: Assume that every plant that the RoundUp touches is going to die. It is a non-selective herbicide.
Read Full Article Here : Tips for Preparing a Planting Bed
Let’s assume that the area where you are planning your bed is now planted in grass. How do you get rid of the grass? Chemicals or no chemicals? Chemicals are easy, so we’ll look at the chemical method first.
My favorite chemical for killing grass and weeds is RoundUp, and used properly it is effective. Rule number one: Read the label on the package, and mix the chemical exactly as recommended by the manufacture. Rule number two: Assume that every plant that the RoundUp touches is going to die. It is a non-selective herbicide.
Read Full Article Here : Tips for Preparing a Planting Bed
Tuesday, November 14, 2006
Getting Rid of Standing Water in Your Yard
Do you have one or more areas in your yard that hold water after a rainfall? This is a common problem, and sometimes difficult to solve. Over the years I’ve talked with dozens of people trying to battle this problem, and on several occasions I have been hired to solve the problem. So what can be done?
Too often people come to me asking what kind of a tree, or what kind of shrubs can be planted in a wet area to dry it up. This is the wrong approach. Most plants, and I mean almost all plants are not going to survive in an area where the soil is soggy for extended periods of time. The roots need to breathe, and planting a tree or shrub in a water area will kill it.
Read Full Article here : Getting Rid of Standing Water in Your Yard
Too often people come to me asking what kind of a tree, or what kind of shrubs can be planted in a wet area to dry it up. This is the wrong approach. Most plants, and I mean almost all plants are not going to survive in an area where the soil is soggy for extended periods of time. The roots need to breathe, and planting a tree or shrub in a water area will kill it.
Read Full Article here : Getting Rid of Standing Water in Your Yard
Gardening is Good Therapy
Many of us garden just for the sheer joy of it. But did you know that all over the country the healing aspects of gardening are being used as therapy or as an adjunct to therapy?
Although this might sound like a new concept, garden therapy has been around for decades. For example, the Garden Therapy Program at Central State Hospital in Milledgeville, and in regional hospitals in Atlanta, Augusta, Columbus, Rome, Thomasville and Savannah, has been helping people for over 40 years through gardening activities known as social and therapeutic horticulture.
So what exactly is social and therapeutic horticulture (or garden therapy)?
According to the article “Your future starts here: practitioners determine the way ahead” from Growth Point (1999) volume 79, pages 4-5, horticultural therapy is the use of plants by a trained professional as a medium through which certain clinically defined goals may be met. “…Therapeutic horticulture is the process by which individuals may develop well-being using plans and horticulture. This is achieved by active or passive involvement.”
Although the physical benefits of garden therapy have not yet been fully realized through research, the overall benefits are almost overwhelming. For starters, gardening therapy programs result in increased elf-esteem and self-confidence for all participants.
Social and therapeutic horticulture also develops social and work skills, literacy and numeric skills, an increased sense of general well-being and the opportunity for social interaction and the development of independence. In some instances it can also lead to employment or further training or education. Obviously different groups will achieve different results.
Groups recovering from major illness or injury, those with physical disabilities, learning disabilities and mental health problems, older people, offenders and those who misuse drugs or alcohol, can all benefit from the therapeutic aspects of gardening as presented through specific therapy related programs. In most cases, those that experience the biggest impact are vulnerable or socially excluded individuals or groups, including the ill, the elderly, and those kept in secure locations, such as hospitals or prisons.
One important benefit to using social and therapeutic horticulture is that traditional forms of communication aren’t always required. This is particularly important for stroke patients, car accident victims, those with cerebral palsy, aphasia or other illnesses or accidents that hinder verbal communication. Gardening activities lend themselves easily to communicative disabled individuals. This in turn builds teamwork, self-esteem and self-confidence, while encouraging social interaction.
Another group that clearly benefits from social and therapeutic horticulture are those that misuse alcohol or substances and those in prison. Teaching horticulture not only becomes a life skill for these individuals, but also develops a wide range of additional benefits.
Social and therapeutic horticultures gives these individuals a chance to participate in a meaningful activity, which produces food, in addition to creating skills relating to responsibility, social skills and work ethic.
The same is true for juvenile offenders. Gardening therapy, as vocational horticulture curriculum, can be a tool to improve social bonding in addition to developing improved attitudes about personal success and a new awareness of personal job preparedness.
The mental benefits don’t end there. Increased abilities in decision-making and self-control are common themes reported by staff in secure psychiatric hospitals. Reports of increased confidence, self-esteem and hope are also common in this environment.
Prison staff have also noticed that gardening therapy improves the social interaction of the inmates, in addition to improving mutual understanding between project staff and prisoners who shared outdoor conditions of work.
It’s interesting that studies in both hospitals and prisons consistently list improving relationships between participants, integrating with the community, life skills and ownership as being some of the real benefits to participants.
But in addition to creating a myriad of emotional and social benefits, the health benefits of being outdoors, breathing in fresh air and doing physical work cannot be overlooked. In most studies, participants noted that fresh air, fitness and weight control where prime benefits that couldn’t be overlooked.
Although unable to pin down a solid reason, studies have shown that human being posses an innate attraction to nature. What we do know, is that being outdoors creates feelings of appreciation, tranquility, spirituality and peace. So it would seem, that just being in a garden setting is in itself restorative. Active gardening only heightens those feelings.
With so many positive benefits to gardening, isn’t it time you got outside and started tending to your garden? Next time you are kneeling in fresh dirt to pull weeds or plant a new variety of a vegetable or flower, think about the tranquility you feel while being outdoors in your garden. Let the act of gardening sooth and revitalize you. Soak up the positive benefits of tending to your own garden.
If you have someone in your life that could benefit from garden therapy, contact your local health unit to find out more about programs in your area. Not only will the enjoyment of gardening help bond you together, but it will also create numerous positive mental and physical benefits for both of you.
So get gardening today for both your physical and mental health. You’ll enjoy the experience so much that you’ll immediately thank yourself.
Valerie Giles operates the Grow Your Own Garden Website which focuses on gardening products, flower and vegetable seeds, atio furniture and garden accessories. Everything you need for the gardening season.http://www.grow-your-own-garden.com
Monday, November 13, 2006
Gardening - Using Bulbs in Your Landscaping
Naturalized bulbs look beautiful in a wooded setting. You can plant them and leave them to multiply. After the bulbs bloom the foliage will die down, but you can interplant bulbs with ground covers for a carefree and beautiful garden.
For a natural look you should arrange your bulbs informally. If you toss them and plant them where they land, with small adjustments for spacing, it'll look much better than if you arrange them.
Bulbs also work well in a perrenial garden. When your bulbs finish blooming your perrenials are just ready to get started and they're now filling in the spaces and hiding the soon to be dormant foliage of your bulbs. This is a great way to extend color in the garden for a good 6 weeks.
Summer bulbs can be used to fill in areas that need color when perrenials have finished. Keep in mind that most summer bulbs do need to be dug up and stored over the winter. The good part is that next season when you replant them you can totally redesign with them.
Whatever your garden style, make sure you add some bulbs. They'll provide you with years of enjoyment!
Favorite Picks
Early Spring
Crocus,Grape Hyacinth,Early Tuplips,Hyacinths,Snow Drops
Mid Spring
Daffodil,Crown Imperial,Iris,Tulips
Summer
Dahlias,Gladiolus,Lily
About the Author
Jill has been an avid gardener for the last 15 years. She faces the challenges of New Mexico's high desert at 6800 feet. Resource websites are http://www.bulbandseed.com and www.agardenwalk.com
More Tips at : Gardening Tips
The Secret of Rooting Cuttings
The secret of rooting cuttings can be summed up in two words.
“Timing and technique”.
When you do your cuttings is every bit as important as how you do them. So if you do the right thing, at the right time of the year, your efforts are sure to bring success. Through this article you will learn both.
"Rooting Hardwood Cuttings of Deciduous Plants"
Hardwood cuttings are much more durable than softwood cuttings which is why hardwoods are the best technique for the home gardener. A deciduous plant is a plant that loses it’s leaves during the winter. All plants go dormant during the winter, but evergreens keep their foliage.
Read full article at : The Secret of Rooting Cuttings
“Timing and technique”.
When you do your cuttings is every bit as important as how you do them. So if you do the right thing, at the right time of the year, your efforts are sure to bring success. Through this article you will learn both.
"Rooting Hardwood Cuttings of Deciduous Plants"
Hardwood cuttings are much more durable than softwood cuttings which is why hardwoods are the best technique for the home gardener. A deciduous plant is a plant that loses it’s leaves during the winter. All plants go dormant during the winter, but evergreens keep their foliage.
Read full article at : The Secret of Rooting Cuttings
Friday, November 10, 2006
Terrace Gardening And Landscaping Ideas
Terraces present wonderful possibilities in the garden. They are outdoor living rooms during good weather and form a transition from the outdoors to the indoors throughout the year.
The terrace may be either at ground level, below ground level, or raised above it. The simplest type is ground level, which requires only the grading we have indicated. There is a wide choice of flooring materials to use. One may use cement, poured and levelled with a large board, but in maintaining the drainage grade or including shallow drainage paths, smooth turf may be used, in which case the preparation will be the same as for other lawn areas and various other types of bases.
The use of flagstones is made simple by applying a load of sand or gravel to the subsoil and digging the flagstones into the sand or gravel. The niches between the stones can be dug out and filled with top-soil and grass or other cover planted between them. This gives a very pleasing effect.
Hollow clay building tiles can be split and laid as units in the terrace floor, their rough edges in the soil. Another good surfacing material is "exposed aggregate," which is free from glare because of its rough finish. For this type of surface, build a form of 2 x 4's. Pour the flooring in squares, one square at a time, and level with a straight board. The material used is a mixture of cement, sharp sand and crushed rock or pebbles.
Redwood or cypress blocks may also be used for terrace floors and are very attractive, although somewhat less durable than stone or brick. You can buy the blocks cut to size and lay them directly in a bed of sand, which in turn has been laid on compacted gravel or cinder. Un-mortared brick, laid in a pattern, on 2 to 4 inches of well-tamped sand, with loose sand in the crevices for grass, makes a hardy and simple-to-construct terrace floor. The bricks may be laid flat or on end, and to keep them from spreading, drive an angle iron against the corners. Use a pattern that follows the lines of your terrace.
The Sunken Terrace Gardening
A sunken terrace is one which is below ground level. It can be very attractive, and it does give a feeling of coolness on a humid day or a hot night. The sunken terrace requires a retaining wall to prevent soil from continually eroding into it, and also to maintain the topsoil of the surrounding garden. The subsoil must be dug to a depth of about 5 or 6 inches below the level you wish to attain with the terrace itself. The use of sand or gravel as a base is of importance. The top treatment can follow your own dictates.
The Raised Terrace Gardening
The raised terrace is generally not fully raised, but starts at the house level and is raised at its outer edge. Again, a retaining wall is called for. The principle problem with the raised terrace is levelling. Once this is accomplished, and the retaining wall built, construction follows the same procedure as in any other case. Drainage is supplied either by a central drain, going into a tile line, or by underground piping through the retaining wall.
About the Author: Landscaping and gardening hasn’t always been my occupation, but it has been my passion for a very long time. I inhale landscaping books and magazines. I have lots of landscaping ideas for all the enthusiasts at http://www.e-landscaping-ideas.com
More Tips at : Gardening Tips
How to Grow Ornamental Grasses
Ornamental grasses have become extremely popular in the past ten years or so, and if you buy them at a garden center they are kind of pricey. Learning how to grow them yourself is actually quite easy. They can be grown from seed, but I won’t pretend to be an expert at that for several reasons. One, I don’t know anything about growing them from seed, and two, I have no desire to propagate them from seed because seedlings require too much care.
The easiest and most effective way to propagate them is through simple division. Of course you will need at least one parent plant of each variety that you would like to grow. If you shop around you might be able to find some 4” inch pots at a fair price.
Read full article at : How to Grow Ornamental Grasses
The easiest and most effective way to propagate them is through simple division. Of course you will need at least one parent plant of each variety that you would like to grow. If you shop around you might be able to find some 4” inch pots at a fair price.
Read full article at : How to Grow Ornamental Grasses
Wednesday, November 08, 2006
Gardening In A Square Foot
If you haven’t heard of square foot gardening, you’re about to learn one of the most useful and versatile gardening techniques ever created. Conceived by Mel Bartholomew, author of Square Foot Gardening, the techniques have been enthusiastically adopted by gardeners all over the world. Square foot gardening is eminently suited for container gardening, patio and roof gardening, backyard gardening, organic gardening, herb gardens, vegetable gardens, flower gardens and more.
The basic concept is to start small – the unit of measure is the square foot. Although Bartholomew’s original square foot garden was four feet square, many schools, community gardens and home gardeners start even smaller – a couple of one square foot containers is plenty to get you started. According to Bartholomew though, a four square foot garden provides just enough harvest for one person.
How to Create A Square Foot Garden
Creating your own square foot garden is as easy as building (or buying) a box in which to garden. My own first square foot garden was a two square foot garden on the cement apron outside my back door in a city apartment. I used four square wicker plastic lined wicker wastebaskets bought for a dollar apiece at the All-for-a-Buck store. Any container that can hold 6-8” of dirt, and has drainage holes in the bottom will work. The biggest requirement for location is sun – choose a nice, sunny spot to place your garden.
Did I say dirt? Amend that. Bartholomew recommends what he calls ‘Mel’s mix’ instead of soil. Mix 1/3 vermiculite, 1/3 peat moss and 1/3 compost to fill the squares of your box or container. A 10 pound bag of each was plenty to fill my little 2 square foot garden.
Choosing and Laying Out the Plants for Your Square Foot Garden
The most important factor in laying out your garden is the one-square-foot grid. You’ll be planting one type of plant in each square – how many of them depends on the recommended spacing between plants – which you’ll find on the back of the seed packets. Depending on the needs of the specific seedlings, you can plant 1, 4, 9 or 16 plants in each square. To break it down – if the recommendation on the seed packet is 1 foot apart, you can plant 1 in a square. If they need six inches between plants, you can plant 4. Two inches gives you room for 9 plants, and one inch spacing means you can fit 16 plants into one square foot.
My own first square foot garden was a spaghetti garden with this layout:
1 Basil Plant 4 Tomato plants
1 Oregano Plant 16 Onion plants
After You Harvest Your Square Foot Garden
Harvest the crop in each square foot when it’s ready, and continue harvesting until it’s no longer producing fruit/vegetables. At that point, uproot the plants in that square (use them for compost!), and plant another, different crop. By refilling and rotating the crops, you avoid depleting the natural nutrients of the soil, and keep every bit of space productive throughout an entire growing season.
About the Author
This article courtesy of http://www.floral-world.org
More Gardening Tips at : Gardening Tips
Tree Pruning Tips
There are two kinds of winter gardening. The first method usually starts in January as the gardening catalogs begin to arrive in the mail. This type of gardening is as easy as sitting in your favorite chair, browsing the catalogs, and either dreaming about what you're going to do this spring, or actually drawing designs for the gardens you intend to work on.
The second type of winter gardening is to actually get out in the yard and do a little work. Of course if it's bitter cold, you'd be better off waiting for a good day. Winter is a good time to do some pruning if the temperatures are around 30 degrees or so. I don't recommend pruning if it's considerably below freezing because the wood is brittle and will shatter when you make a cut.
Read full article at : Tree Pruning Tips
The second type of winter gardening is to actually get out in the yard and do a little work. Of course if it's bitter cold, you'd be better off waiting for a good day. Winter is a good time to do some pruning if the temperatures are around 30 degrees or so. I don't recommend pruning if it's considerably below freezing because the wood is brittle and will shatter when you make a cut.
Read full article at : Tree Pruning Tips
Saturday, November 04, 2006
Using the Propagation Technique Known as Budding to Grow Beautiful Ornamental Trees
Flowering Dogwood trees can be easily grown from seed, however 99.9999% of the seedlings that sprout will be Cornus Florida, which is White Flowering Dogwood. It doesn’t matter if you collect the seeds from a White Dogwood or a Pink Dogwood, the seedlings are likely to be white.
The only predictable way to grow a Pink Dogwood, Red Dogwood, or one of the beautiful Dogwoods with variegated leaves, is to bud or graft the desired variety onto a White Dogwood seedling. That’s why the botanical name for Pink Dogwood is Cornus Florida Rubra. Cornus means Dogwood, Florida indicates White, Rubra indicates Red or Pink. Cornus Florida Rubra indicates Pink Dogwood grown on White Dogwood rootstock.
Read the full article here : Using the Propagation Technique Known as Budding to Grow Beautiful Ornamental Trees
The only predictable way to grow a Pink Dogwood, Red Dogwood, or one of the beautiful Dogwoods with variegated leaves, is to bud or graft the desired variety onto a White Dogwood seedling. That’s why the botanical name for Pink Dogwood is Cornus Florida Rubra. Cornus means Dogwood, Florida indicates White, Rubra indicates Red or Pink. Cornus Florida Rubra indicates Pink Dogwood grown on White Dogwood rootstock.
Read the full article here : Using the Propagation Technique Known as Budding to Grow Beautiful Ornamental Trees
Friday, November 03, 2006
How to Grow Japanese Red Maple Trees from Seed
Most Japanese Maple seeds ripen in the fall. Watch the tree and wait for the seeds to turn brown. The seeds are ready to be harvested when they are brown and can be easily removed from the tree.
The seeds are attached to a wing, it’s best to break the wing off before storing or planting the seeds. Japanese Maple seeds have a very hard outer coating as do many ornamental plants. Under natural conditions the seeds would have to be on the ground for almost two years before they would germinate. All that happens the first winter is the moisture softens the hard outer shell, and the second winter germination is beginning to take place.
In order for all of this to happen in the proper sequence so the seedlings actually sprout at a time of the year when freezing temperatures or hot summer sun doesn’t kill them, takes a tremendous amount of luck.
Read the Full Article at : Gardening Tips
The seeds are attached to a wing, it’s best to break the wing off before storing or planting the seeds. Japanese Maple seeds have a very hard outer coating as do many ornamental plants. Under natural conditions the seeds would have to be on the ground for almost two years before they would germinate. All that happens the first winter is the moisture softens the hard outer shell, and the second winter germination is beginning to take place.
In order for all of this to happen in the proper sequence so the seedlings actually sprout at a time of the year when freezing temperatures or hot summer sun doesn’t kill them, takes a tremendous amount of luck.
Read the Full Article at : Gardening Tips
Thursday, November 02, 2006
Gardening- An Expression
Give the same plants to several people, you will see several arrangements. Each one distinct and different, yet, using the same plants.
This is the ultimate reward of gardening- a means to express, to create with the help and inspiration from the gifts of Nature.
Gardening is not just physically and aesthetically rewarding.It enriches the spirit. It awakens one’s creativity that lies dormant from neglect, or lack of motivation, or a popular excuse, not enough time.
Gardening is fast becoming a popular hobby of the times. From the tropics , to the frigid climes, gardening centers are offering more choices to tantalize even the most conservative taste.
Each year, gardeners look forward with excitement to their gardening; a hobby they take passionately. What new plants are being introduced? What variety of surprises awaits them? The ornamental gardener will be glorious with the new plants or hybrids for the present growing season. The vegetable/herb gardener looks forward with anticipation at harvest time.
With so much variety to choose from, what factors determine which plants to buy? After considering the soil, weather, sun/shade location factors, the choice is all about self- expression.
No two gardens are alike, given the same set of plants.
Colors are as revealing as the plants. A conservative gardener will opt for traditional plants. At times, you see the same plants, the same arrangements year after year. Aha!! Perhaps the gardener does not adapt to change too quickly. It may be lack of time, or change of physical health.
Vibrant colors in the garden reflect a vibrant gardener. A garden bursting with colors is very attractive and pleasing to look at. It is inviting.
What about passion? They say red is a color of passion, of energy and courage. Add white to the reds, and the garden beckons the passer-by to take a look. Someone said this combination looks like a candy cane.
My garden is overcome by burst of yellows and orange, not really by choice. Somehow, it gives out a golden glow as the blooms bask in the sun. It reflects my enthusiasm for life. Many of my plants are gifts from friends, treasures for my garden. Yellow flowers remind me of my mother.
Purples and blues in the garden are colors of reflection, of peace and calm. Add white flowers to this and it invites a meditative mood.
After colors, the arrangements of the plants reveal something of the person. I have a friend whose flowerbeds are symmetrical, weedless, picture- perfect, right out of a magazine. Indeed, this expresses her organized way of thinking and living.
A gardener who loves to re-arrange the plants and loves to add new plants and ornaments shows an enthusiastic and energetic spirit, ready to welcome change, eager to experiment.
What about an overgrown garden? Perhaps it reflects someone with scattered energies, at times, a full plate, or one who does not have the time or energy to tend the garden. It may well show one who starts with a burst of enthusiasm that wanes quickly after the planting is done.
No matter how you plan your garden, it is a creative tool that allows you to express yourself. Gardening is therapeutic,physically, mentally and spiritually.
Happy gardening.
More Tips at : Gardening Tips
Tuesday, October 31, 2006
Transplanting Tips
Early spring is a great time for transplanting trees and shrubs, but you must do so before they wake up. Transplanting a plant is a very traumatic experience for the plant if it is awake. It’s like doing surgery on a person while they are awake. Dormancy starts in the fall as soon as you experience a good hard freeze, and the plants remain dormant until the weather warms up in the spring. This is when you should transplant, while the plants are dormant.
You can transplant in the spring up until the plants leaf out. When the buds are green and swollen you are usually safe to still transplant, but once the leaf develops, you should wait until fall. When transplanting you can dig the shrubs out bare root, just make sure they are out of the ground for as short a time as possible, and keep the roots damp while out of the ground.
Read the full article here : Transplanting Tips
You can transplant in the spring up until the plants leaf out. When the buds are green and swollen you are usually safe to still transplant, but once the leaf develops, you should wait until fall. When transplanting you can dig the shrubs out bare root, just make sure they are out of the ground for as short a time as possible, and keep the roots damp while out of the ground.
Read the full article here : Transplanting Tips
Gardening in Containers
Container gardening is a wonderful idea whether you have a garden bed or not. It's perfect for apartments or small areas, but can also really enhance your patio. Here are some tips on gardening in containers.
Every Garden can benefit from the addition of container gardens. They add interst and variety, plus are easily moved around. If you live in an apartment or have a small area to work with this may be the only solution for you.
Your Container
Your container can be pretty much anything and is only limited to your imagination. Just make sure there is adequate drainage for your plants. I love old buckets, discarded kitchen pots and baskets for a rustic feel. For a formal garden choose a more traditional container.
Regardless of your choice of container, make sure it's not to big or too small for your planting.
Your Soil
Do not use garden soil for your container plants. Garden soil is too heavy, dries out too quickly and will not provide the needed nutrients your container plants need. You can find good potting soil at your local garden center or you can mix your own.
To mix your own make sure you include soil, peat, sand and a slow release fertilizer.
Maintenance
You'll need to pay close attention to your container grown plants -- much more than plants in your garden beds. The soil will dry out more quickly so frequent watering it a must. You'll also need to fertilize more frequently. Water in the morning or evening whenever the soil is almost dry and water thoroughly until water comes out the bottom drainage holes.
One thing I really love about container gardening is mobility. If a particular grouping doesn''t work you can simply move your pots and change your garden design.
Have fun, experiment and be creative!
About the Author
Jill has been an avid gardener for the last 15 years. She faces the challenges of New Mexico's high desert at 6800 feet.
Resource websites are http://www.bulbandseed.com and www.agardenwalk.com
More Tips at : Gardening Tips
Monday, October 30, 2006
It's Gardening Season
It's Gardening season again! Are you ready? Whether you are a seasoned gardener, or are looking to start gardening, you will likely need supplies and plants. If you shop smart, and use the tips below, you can get that garden running with very little money. And you can save a lot of money on your grocery bill as well.
There are many different types of gardening, but it is important to learn the basics of the activity. Below you will find a list of my tips to planting a garden on a budget.
Read the full article here : http://gardeningtips.infoplugin.com/permalink.php?article=its_gardening_season.txt
There are many different types of gardening, but it is important to learn the basics of the activity. Below you will find a list of my tips to planting a garden on a budget.
Read the full article here : http://gardeningtips.infoplugin.com/permalink.php?article=its_gardening_season.txt
How to Build a Simple Potting Bench
The potting bench that you are about to read about is not fancy, but very functional. It is also very easy to build and use. Except it doesn't have any legs! Don't panic, having a legless potting bench is actually a benefit, I'll get to that a little later.
The potting bench described in this article is actually identical to the potting bench that we have been using for years in our backyard nursery, and it has served us well, potting up tens of thousands of plants. I like it because it is large enough to pot up around ten small plants at a time, and it holds a significant amount of soil.
However, since I originally wrote this article, I designed and built a potting bench for home gardeners that you may like better. There are lots of photos and step by step plans for building it on this page: http://www.freeplants.com/free-potting-bench-plans.htm
On the above page you will also find a photo of one of my other potting bench designs, an outhouse with a flip out potting bench! It's unique, that's for sure.
Okay, back to my legless potting bench.
Read the full story at : http://gardeningtips.infoplugin.com/permalink.php?article=How-to-Build-a-Simple-Potting-Bench.txt
The potting bench described in this article is actually identical to the potting bench that we have been using for years in our backyard nursery, and it has served us well, potting up tens of thousands of plants. I like it because it is large enough to pot up around ten small plants at a time, and it holds a significant amount of soil.
However, since I originally wrote this article, I designed and built a potting bench for home gardeners that you may like better. There are lots of photos and step by step plans for building it on this page: http://www.freeplants.com/free-potting-bench-plans.htm
On the above page you will also find a photo of one of my other potting bench designs, an outhouse with a flip out potting bench! It's unique, that's for sure.
Okay, back to my legless potting bench.
Read the full story at : http://gardeningtips.infoplugin.com/permalink.php?article=How-to-Build-a-Simple-Potting-Bench.txt
Saturday, October 28, 2006
How to Lose Weight While Gardening
Have you ever dreaded the idea of pulling weeds, planting a tree, or pushing a lawn mower around the yard?
Does just thinking about it make you sweat? I am sure the majority of are nodding your heads in agreement. What I am about to suggest only takes a slight change in your thinking and a bit of planning and you can learn how to lose weight and get in better shape while gardening this year.
For those of you that are already gardeners, you know that gardening is one of the best ways to get exercise because it involves all of the muscle groups in your body.
Like I mentioned earlier, we only need to change the way you think about outside chores. See I am falling into the trap too, I just called them chores. Instead, you should think of them as outdoor exercises that are designed to enhance the condition of your body and help you lose weight.
As with any exercise program, check with your doctor before starting. Make sure you are dressed properly and that you stretch before beginning.
If you aren’t used to exercising in the garden or have been relatively inactive all winter, start slowly. Start with weeding, watering, and planting seeds.
As you feel yourself getting stronger you can increase your gardening repertoire to include: pruning, heavy digging, hoeing, pushing a loaded wheelbarrow, or mowing the lawn. I think you get the idea because the list of outdoor gardening exercise ideas is endless!
Even carrying plants or a bag of potting soil to the car from the store and then out into the yard is exercise! You can potentially burn up to 300-600 calories per hour depending on your intensity and which gardening exercises you engage in.
You CAN lose weight by gardening ~ eat less and move more! The following list shows what a typical man weighing 180 pounds will burn in 30 minutes of activity. If you weigh more you can burn even more calories!
1. Don’t over do it~ one or two hours of gardening is plenty, especially when you are beginning!
2. Don’t lift objects that are too heavy for you. If you injure yourself, chances are that you won’t be able to continue to garden for exercise and weight loss.
3. Stretch before, during and after gardening. Don’t stay down on your knees while weeding or planting for extended periods of time~ get up and move!
4. Get out in your garden and exercise at least 3-4 times a week.
5. Continue your outdoor exercise routine even after you last blooms have faded. Shoveling the snow, raking leaves, and splitting wood are great calorie burners that will lead to weight loss!
6. Don’t forget the added benefit of growing your own healthy fruits and vegetables and your yard will look beautiful from all of your hard work!
7. Have Fun and "Just do it"!
Once you get into the habit of viewing gardening as an excellent way to lose weight and stay in shape, you may never go back to the gym again!
About the Author
© 2005, Candee Stark and Flowers&Garden.com
This article is provided courtesy of Flowers & Garden.com
Does just thinking about it make you sweat? I am sure the majority of are nodding your heads in agreement. What I am about to suggest only takes a slight change in your thinking and a bit of planning and you can learn how to lose weight and get in better shape while gardening this year.
For those of you that are already gardeners, you know that gardening is one of the best ways to get exercise because it involves all of the muscle groups in your body.
Like I mentioned earlier, we only need to change the way you think about outside chores. See I am falling into the trap too, I just called them chores. Instead, you should think of them as outdoor exercises that are designed to enhance the condition of your body and help you lose weight.
As with any exercise program, check with your doctor before starting. Make sure you are dressed properly and that you stretch before beginning.
If you aren’t used to exercising in the garden or have been relatively inactive all winter, start slowly. Start with weeding, watering, and planting seeds.
As you feel yourself getting stronger you can increase your gardening repertoire to include: pruning, heavy digging, hoeing, pushing a loaded wheelbarrow, or mowing the lawn. I think you get the idea because the list of outdoor gardening exercise ideas is endless!
Even carrying plants or a bag of potting soil to the car from the store and then out into the yard is exercise! You can potentially burn up to 300-600 calories per hour depending on your intensity and which gardening exercises you engage in.
You CAN lose weight by gardening ~ eat less and move more! The following list shows what a typical man weighing 180 pounds will burn in 30 minutes of activity. If you weigh more you can burn even more calories!
- Watering lawn/garden~ 61
- Raking~ 162
- Bagging leaves~ 162
- Planting seeds/seedlings~ 162
- Planting trees~ 182
- Weeding ~ 182
- Clearing Land ~ 202
- Digging, spading, tilling~ 202
- Laying Sod~202
- General gardening~ 202
- Chopping wood~ 243
- Gardening with heavy power tools~ 243
- Mowing the lawn with a push mower~ 243
- Shoveling snow~ 243
- Shoveling heavy snow~ 364 cals
1. Don’t over do it~ one or two hours of gardening is plenty, especially when you are beginning!
2. Don’t lift objects that are too heavy for you. If you injure yourself, chances are that you won’t be able to continue to garden for exercise and weight loss.
3. Stretch before, during and after gardening. Don’t stay down on your knees while weeding or planting for extended periods of time~ get up and move!
4. Get out in your garden and exercise at least 3-4 times a week.
5. Continue your outdoor exercise routine even after you last blooms have faded. Shoveling the snow, raking leaves, and splitting wood are great calorie burners that will lead to weight loss!
6. Don’t forget the added benefit of growing your own healthy fruits and vegetables and your yard will look beautiful from all of your hard work!
7. Have Fun and "Just do it"!
Once you get into the habit of viewing gardening as an excellent way to lose weight and stay in shape, you may never go back to the gym again!
About the Author
© 2005, Candee Stark and Flowers&Garden.com
This article is provided courtesy of Flowers & Garden.com
More Tips at : Gardening Tips
Thursday, October 26, 2006
Tips For Windowsill Gardening
Believe it or not, keeping the green of Spring in you life year-round, is easier than you think. While it’s great fun to get outside and start planting that vegetable or flower garden, many people keep the freshness in their life even during the winter, by starting windowsill gardens.
Of all plants that are easiest to grow indoors, herbs are at the top of the list. Not only are they green and decorative, they’re also delicious. And when grown in the kitchen, they’re just a step away from the pot of spaghetti sauce or the stew that’s cooking for dinner.
It’s possible to purchase commercial kits that contain seeds for a variety of herbs, as well as a plastic seed bed with a clear hood. These kits usually include a growing medium, and sometimes may also have small pots for transplanting the seeds to once they are growing. Alternatively, you can use a clear, hard plastic box that you bought donuts in, and create you own little “greenhouse”, purchasing only the seeds you want, and buying small pots and growing medium in the quantity you’ll need.
How you set up your “garden” depends greatly on the space of your windowsill. It may only be wide enough to hold small pots once the plants are established. But if you want more room for the seedling boxes, or a sturdy and safe place for your growing plants, consider fixing a wooden shelf under the sill. These can often be found at craft stores or fairs, in the unfinished wood, so that you can paint or varnish them as you please. Many also come with the hooks for mugs and cups, so they’re a great addition to kitchen décor.
If you can get one that has a small railing around the edge of the shelf, that’s all the better, as it keeps pots from accidentally sliding off if someone bumps the shelf.
Although the kitchen is a desirable spot, your plants will do best in a window that has at least six hours of sunlight a day, to keep the growth cycle moving along. This could be an east or south window. West windows tend to have the hottest sun, which may not be good for tender young plants, especially in Spring or Summer. If the window area tends to be extremely cold during winter nights, you may want to put the plants down on a cupboard or table until the sun comes back up.
Be careful of your watering habits, since plants in pots do not lose their water into the earth around them like they would in a garden. Water only when the soil is beginning to dry. But remember also, that your house does not have the same humidity as an outdoor garden, and in winter particularly, indoor heating systems dry out the air. Mist your plants in winter, to keep leaves from drying out, and to prevent the proliferation of certain pests.
Herbs are by no means the only “garden” plant that can be grown indoors year-round. Some annuals and even a few perennials can be grown successfully, given the right soil and temperature conditions. If you have the space, then decorative urns make a wonderful impromptu garden that will yield everything from tomatoes, to spinach, to beans! Give it a try, and see what grows inside your home this year.
About the Author
Johann Erickson is the owner of Online Discount Mart and TV Products 4 Less.
More Tips at : Gardening Tips
Vegetable Gardening Tips At Your Backyard
Would it be possible for you to grow a vegetable garden at your backyard? Consider this option, healthy foods just within your reach. Even your children can help and cultivate their own vegetables. Having fun while learning is not a bad idea right? But you have to plan ahead before you start.
Which Veggie?
Plan which vegetables you would like to grow in your garden. Choose early, middle of the season and late kinds of these vegetables, which you like best.
Against all veggie odds
You have to know the odd characteristics of certain vegetables and use them to best advantage. Some vegetables bloom even in partially shaded positions, while others require lots of sunshine.
Goodie veggies
Good vegetables are of exceptionally slow growth during the seedling stage of development. You have to take advantage of this by using space between rows for quick-growing crops. For example, propagate beet seed by middle of April and position young lettuce plants between the rows.
Don't let the water run dry
Throughout dry periods, vegetable gardens need extra watering. Most vegetables benefit from an inch or more of water each week, especially when they are fruiting.
De-pest the infested
During the growing season be attentive against insect pests. If you discover a bug problem early it will make it much easier to take suitable action and get rid of the pests. But be careful to not use pesticides once the vegetable have grown unless it becomes an absolute necessity. Organic gardening is one healthy and environment-friendly option. Once you have reaped your crop, put the used up vegetable matter into your fertilizer pile so that it can be recycled for next spring.
Animal appeal not needed
It is important to protect your vegetable garden. In most cases, the garden is surrounded by a fence adequately high and close-woven to keep out dogs, rabbits, and other animals. The harm done by wandering animals during a season can equal the cost of a fence. A fence also can serve as a frame for peas, beans, tomatoes, and other crops that need support.
Protection is needed in order for your vegetable garden to yield a bountiful harvest. Hard work would pay off if necessary precaution has been made. Learning is a process, vegetable gardening needs time. See to it you have patience and dedication to it.
Source: www.isnare.com
More Tips at : Gardening Tips
Tuesday, October 24, 2006
Mulch Your Spring Flower Bulbs in the Fall for a Beautiful Spring Display
Flower bulbs need a good, long, winters sleep. Like some people we know, if they wake up before they are fully rested, they get kind of cranky, and then they don’t bloom well at all.
Actually what happens is during a mild winter, the soil stays too warm, and the bulbs begin to come out of dormancy early. They start to grow, and once the tips emerge above the soil line, they are subject to freezing if the temperatures dip back down below freezing. And that’s usually what happens. After the bulbs have emerged, they freeze and then don’t bloom at all, or if they do it’s a very sad display.
Another reason this happens is because the bulbs are not planted deep enough. They may have been deep enough when you planted them, but as the soil goes through the freezing and thawing process, the bulbs can actually work their way up in the ground. One way to keep your flower bulbs sleeping longer, which will protect them from freezing, is to mulch the bed.
Read More at : Gardening Tips
Actually what happens is during a mild winter, the soil stays too warm, and the bulbs begin to come out of dormancy early. They start to grow, and once the tips emerge above the soil line, they are subject to freezing if the temperatures dip back down below freezing. And that’s usually what happens. After the bulbs have emerged, they freeze and then don’t bloom at all, or if they do it’s a very sad display.
Another reason this happens is because the bulbs are not planted deep enough. They may have been deep enough when you planted them, but as the soil goes through the freezing and thawing process, the bulbs can actually work their way up in the ground. One way to keep your flower bulbs sleeping longer, which will protect them from freezing, is to mulch the bed.
Read More at : Gardening Tips
Thursday, October 19, 2006
Winter Gardening Fun
“Exchanging Plants, Seeds and Flowers for Winter Gardening Fun” Exciting New Winter Garden Fun!
GardenHere turns grey cold weather months into exciting home gardening fun. While other gardening enthusiast are waiting for Spring plant and seed catalogs, GardenHere members are busy growing landscape and flower starts in their window sills to trade with other home gardeners around the country.
Daylily and Iris tubers in the garage that I didn’t have time to get in the ground this fall. I’m sure some of our GardenHere members will want them when spring arrives.” Most gardeners in the South never see snow or experience temperatures even close to freezing. Some garden fanatics in the North protect their prize plants in home greenhouses. Most of these gardeners have too many of some plants and would like to either give a way some of their extra landscape plants and flowers or trade for plant varieties they do not already have.
The GardenHere Internet site makes it easy to exchange plants, seeds and flowers. It takes about 60 seconds to register and membership is free. After that, home gardeners can place messages in the forums offering their extra plants and flowers, or tell other members what they would like in exchange. It’s all very simple and fun.
“Last month I received 20 new varieties of Daylilies and two cold hardy Hibiscus plants,” said GardenHere founder, Al Stubblefield. “The only cost to me was postage, which was less than $6 dollars. That’s hard to beat.” Here’s what another garden member had to say, “As many of you know, I started up my own eBay business a few months ago. Well, turns out that a GardenHere member, Fern, had made some purchases from me on e-Bay recently. We figured this out when Fern recognized my name and address I sent her in regards to a trade we were setting up.
”She sent me tons and tons of glad bulbs and bulbils, plus some seeds in exchange for my sedum, ginger and seeds from my prize Zinnias I grew this summer. “What a small world and what an awesome trade. Thanks again, Fern. I hope to trade again soon,” posted by GardenHere Member, Nicole.GardenHere Member Copperlilac had this to say, “I just finished a trade with Maineroses. I sent her Peonies for Irises and she included a great baby Lupine and seeds as a bonus.
“Thanks for the great trade Maineroses.” Finally, GardenHere Member Dee wrote, “I have some baby Gladiolus. I have so many different colors I couldn't tell you what colors they would be. By the way, do you know how to keep them from having too many offspring? I have to throw away hundreds each year because I have no one to give them to.
Gardeners interested in joining this friendly home gardening community are invited to register at GardenHere Forums. It only takes about 60 seconds to register and membership is free."Exchanging Plants and Flowers is the Neighborly Thing To Do"About the Author© 2004 - “GardenHere is one of America’s favorite home gardening communities on the Internet, says owner and web designer Al Stubblefield. “It is a popular place to make friends, do garden exchanges, trade home gardening tips, and get plant advice.”
GardenHere turns grey cold weather months into exciting home gardening fun. While other gardening enthusiast are waiting for Spring plant and seed catalogs, GardenHere members are busy growing landscape and flower starts in their window sills to trade with other home gardeners around the country.
Daylily and Iris tubers in the garage that I didn’t have time to get in the ground this fall. I’m sure some of our GardenHere members will want them when spring arrives.” Most gardeners in the South never see snow or experience temperatures even close to freezing. Some garden fanatics in the North protect their prize plants in home greenhouses. Most of these gardeners have too many of some plants and would like to either give a way some of their extra landscape plants and flowers or trade for plant varieties they do not already have.
The GardenHere Internet site makes it easy to exchange plants, seeds and flowers. It takes about 60 seconds to register and membership is free. After that, home gardeners can place messages in the forums offering their extra plants and flowers, or tell other members what they would like in exchange. It’s all very simple and fun.
“Last month I received 20 new varieties of Daylilies and two cold hardy Hibiscus plants,” said GardenHere founder, Al Stubblefield. “The only cost to me was postage, which was less than $6 dollars. That’s hard to beat.” Here’s what another garden member had to say, “As many of you know, I started up my own eBay business a few months ago. Well, turns out that a GardenHere member, Fern, had made some purchases from me on e-Bay recently. We figured this out when Fern recognized my name and address I sent her in regards to a trade we were setting up.
”She sent me tons and tons of glad bulbs and bulbils, plus some seeds in exchange for my sedum, ginger and seeds from my prize Zinnias I grew this summer. “What a small world and what an awesome trade. Thanks again, Fern. I hope to trade again soon,” posted by GardenHere Member, Nicole.GardenHere Member Copperlilac had this to say, “I just finished a trade with Maineroses. I sent her Peonies for Irises and she included a great baby Lupine and seeds as a bonus.
“Thanks for the great trade Maineroses.” Finally, GardenHere Member Dee wrote, “I have some baby Gladiolus. I have so many different colors I couldn't tell you what colors they would be. By the way, do you know how to keep them from having too many offspring? I have to throw away hundreds each year because I have no one to give them to.
Gardeners interested in joining this friendly home gardening community are invited to register at GardenHere Forums. It only takes about 60 seconds to register and membership is free."Exchanging Plants and Flowers is the Neighborly Thing To Do"About the Author© 2004 - “GardenHere is one of America’s favorite home gardening communities on the Internet, says owner and web designer Al Stubblefield. “It is a popular place to make friends, do garden exchanges, trade home gardening tips, and get plant advice.”
More Tips at : Gardening Tips
Monday, October 16, 2006
Winter Gardening
Ok, the title might be a tad bit misleading. I am not suggesting that you actually garden during the winter but you should be using this time to plan your upcoming garden.
As you look out at your yard and garden area during the cold months of winter, let your thoughts run wild and you will be amazed at what images you can conjure up. You might even want to try some of your new found ideas this spring!
1. Pour through garden catalogs, flip the pages and fold down the corner anytime you find something you like. Go back to it often until you decide what new plants and flowers you would like to try this spring.
2. Purchase a gardening book or magazine. Look at what other people are trying in their gardens and see if their ideas inspire you to try something new.
3. Look out your windows and try to visualize how you would like your yard and garden to look like. Study the sun....notice the shady spots.
4. Make a list of what is important to you, in other words, what do you want from your yard and garden? Do you want to create a patio area for entertaining, a vegetable garden so you grow all of your own vegetables, a quiet area for relaxing, or maybe an area that will attract wildlife. Anything is possible but it is important to recognize what you want before you actually start any gardening project. Ultimately, knowing what you want will save time and money!
5. Take lots of notes and draw any ideas you might come up with.(even those ideas that wake you up in the middle of the night!)
6. Of course, visit online nurseries to see what they have to offer. Many sites offer suggestions and interesting gardening articles as well.
Before you know it spring will be here, you will have a shovel in your hand, and you will have a plan! Always Happy Gardening!
About the Author
© 2005, Candee Stark and Flowers & Garden.com
This article is provided courtesy of Flowers and Garden.com - You may freely reprint this article on your website or in your newsletter provided this courtesy notice and the author name and URL remain intact.
Subscribe to our daily Flowers&Garden Blog
More Tips at : Gardening Tips
Friday, October 13, 2006
Wind Chimes Go Great With Gardening
What could be more relaxing than gardening on a nice summer morning? Listening to your wind chime while you garden! Wind chimes are not only fun to look at but they add much more to your garden then just visual appeal.
Wind chimes have tones and vibrations that soothe and calm the mind helping to release all your stress. When you dig in the garden and connect with the earth, listening to your chimes tinkle in the breeze can help you also connect with your inner spirit. Chimes have been used for much more than just decoration for centuries. In fact, wind chimes are used in many Feng Shui cures. You can hang your chimes inside as well as outside, metal chimes are best for North, Northwest and West while wood chimes are best for South, Southeast and East. The number of rods can be associated with the cure you want. Use 4, 6, 7, 8 or 18 rods for luck and 5 rods to reject bad energy. Use bamboo for outside.
Of course, you should pick chimes that decorate your porch or garden area to your liking. There’s plenty of styles and materials to choose from. I favor the chimes with a stained glass decoration on top that comes in all kinds of whimsical styles. If you are more traditional, you might go for a simple bamboo chime with an Asian flair. You can even get chimes that are hand tuned if you are really into the sound quality of your wind chime.
Hanging your wind chimes is easy. To hang from the top of your porch, you can use a simple C shaped hook that screws into the ceiling. Any type hook can be used as long as it is strong enough to support your wind chime. Be sure you hang it in an area where it’s freedom of movement is not obstructed by anything. You can also buy fancy hangers that screw in or that stick up from the ground. When hanging your chime, try to pick a place that will not get a strong wind – this way you can be sure your chime does not blow off and break.
So, the next time that you get out into the garden, make sure that you hang out some wind chimes so that you can add a new level to your gardening experience!
About the Author
Lee Dobbins writes for http://www.wonderful-wind-chimes.com where you can find all kinds of wind chimes to brighten your day. Learn more about the differnt kinds of stained glass chimes at http://www.wonderful-wind-chimes.com/Glass-Chimes.html
More Tips at : Gardening Tips
Tuesday, October 10, 2006
Make The Most Of Fall Gardening
While most gardeners consider spring the most serious planting season, and consider planting season over my mid summer this isn't the case. Now there are many lovely flowers and attractive vegetables that can be planted in late summer to be enjoyed this fall.
One of the perks of fall gardening is the much more tolerable weather, for both you and your plants. The scorching heat and sun of July and August has gone. Plants grown in the fall have much more ideal weather conditions in which to thrive and grow. If you want to extend your gardening season into fall consider planting root vegetables like carrots, radishes and beets. Lettuce and spinach and potatoes do well planted in fall. Also, fall is a good time to take a look around your yard as this is the time of year that some perennials and trees can be planted. Don't forget spring flower bulbs! Now is the time to go through those catalogs you've been receiving and make your order for your show next spring!
Fall is also a time to take stock of your garden for next year. Start with your soil. The back bone of any garden is the soil. It doesn't matter how much you spend on your plants and flowers, if you don't have good soil in your garden they won't thrive and grow well for you.. Your soil needs to be porous and absorb water well. Do you need to add a soil ammender? Do you need to add a fertilizer? It's good to do this on a regular basis as fertilizers encourage and stimulate plant growth. What were your bug problems last year? Before you have loss or damage to your garden next year make sure that you're prepared.
You've seen how your plants have performed this season. What did well and what didn't? Is there a plant that can be moved to a different location where it might fare better? What plants need to be divided? Can you use these new divisions somewhere else in the yard? Fall is the time to walk around your garden and make notes for spring. It's also a good idea for you to make a sketch of the garden itself, noting where each flower is. This way you'll know in spring that what's coming up is a perennial returning, and not a weed to be pulled.
About the Author
This article provided courtesy of http://www.florists-shopper.com
More Tips at : Gardening Tips
One of the perks of fall gardening is the much more tolerable weather, for both you and your plants. The scorching heat and sun of July and August has gone. Plants grown in the fall have much more ideal weather conditions in which to thrive and grow. If you want to extend your gardening season into fall consider planting root vegetables like carrots, radishes and beets. Lettuce and spinach and potatoes do well planted in fall. Also, fall is a good time to take a look around your yard as this is the time of year that some perennials and trees can be planted. Don't forget spring flower bulbs! Now is the time to go through those catalogs you've been receiving and make your order for your show next spring!
Fall is also a time to take stock of your garden for next year. Start with your soil. The back bone of any garden is the soil. It doesn't matter how much you spend on your plants and flowers, if you don't have good soil in your garden they won't thrive and grow well for you.. Your soil needs to be porous and absorb water well. Do you need to add a soil ammender? Do you need to add a fertilizer? It's good to do this on a regular basis as fertilizers encourage and stimulate plant growth. What were your bug problems last year? Before you have loss or damage to your garden next year make sure that you're prepared.
You've seen how your plants have performed this season. What did well and what didn't? Is there a plant that can be moved to a different location where it might fare better? What plants need to be divided? Can you use these new divisions somewhere else in the yard? Fall is the time to walk around your garden and make notes for spring. It's also a good idea for you to make a sketch of the garden itself, noting where each flower is. This way you'll know in spring that what's coming up is a perennial returning, and not a weed to be pulled.
About the Author
This article provided courtesy of http://www.florists-shopper.com
More Tips at : Gardening Tips
Monday, October 09, 2006
Organic Gardening: Going Back To The Basics
Because of an alarming condition of our atmosphere these days and the impact of technological innovations have on our health, everything seems to be resorting to a more viable option - organics. From foods to even hobbies like gardening, organics had definitely taken the limelight.
Nowadays, one of the gradually emerging lucrative activity for hobbyist, and environmentalist for that matter, is organic gardening. It slowly replaces the traditional type of gardening that involves harmful chemicals that speed up the destruction of our Ozone layer.
Organic gardening, basically, refers to one type of gardening that deviates from the customary use of chemicals like fertilizers and pesticides. Because of these, many agriculturists contend that engaging into organics gardening makes one in synchrony with nature.
The basic notion of organics gardening boils down to the fact that it is best to feed the soil and not the plant. Thus, we can hypothetically say that, in organic gardening, it is the soil that needs more nourishment than the plants, or simply because it's from the soil that the plants obtain their nourishment. A healthy soil yields a healthy plant, so to speak.
In organic gardening, the basic concept of "fertilizing" the soil is to use organic materials like composts and manures. When fertilizing the soil, it doesn't necessarily mean that you use fertilizers. In fact, fertilizers were primarily denoted as anything that increases the soil's fertility.
Hence, organic gardening is a way of going back to the basics, the traditional use of basic fertilizers that increases the soil's capability to enrich the plant. In this manner, the grower uses minerals like calcium coming from the fossils of dead animals, nitrogen from legumes or manures, phosphorus from bones of dead animals, and potassium from wood ashes.
On the other hand, organic growers also consider composts of other living things like vegetables or plants when incorporating the idea of organic gardening. Its by-product is known as the humus, which is definitely good for the soil. In organic gardening, humus is an important element in plant production because it contains cellulose that performs like a sponge and retains moisture in the soil so that it will be made available for the plants as they grow.
Moreover, organic gardening incorporates the traditional way of controlling animal pests like physical removal of insects, crop rotation, interplanting, and introduction of prey species. These methods lessen the growth of insects and curb the multiplication of pests. It also impedes the development of diseases that were emphasized by "agribusiness monocropping".
In addition, organic gardening employs the typical suppression of weeds and vegetables pests without having to opt for herbicides. In this organic gardening method of removing weeds, "mulches" are placed on the weeds to prevent them from obtaining the amount of light they need in order to grow. These mulches act as barriers for weeds and vegetable pests. They come in different forms like leaves, stones, wood, or straw.
In general, the technique of organic gardening lies on two agricultural concept: permaculture and biodynamic agriculture.
Permaculture or permanent culture refers to that area in agriculture wherein certain ecological principle, "shared ethics" like earth care and people care, and design tools are used so as to gain sustainable development in plants. On the other hand, biodynamics agriculture is composed of a biological at the same time sustainable system of agricultural assembly.
With these two concepts, we can safely derive the fundamental idea of organic gardening as a system based on environmental, sustainable, and ethical principles of man.
So, we now know for a fact that organic gardening is definitely a lot better than what science and technology teaches us these days.
The only drawback is that it is science that taught us the basic ways on how to care for the environment in the first place, and yet, it is also the same mentor who is teaching us how to employ concepts that eventually leads to nature's destruction. Isn't it ironic?
About the Author: Subscribe to "Gardening Secrets Unearthed" 7-part e-mail course from http://GardeningSecretsAndTips.com! Discover the keys to having a garden a professional landscaper would envy.Source: www.isnare.com
More Tips at : Gardening Tips
Tuesday, October 03, 2006
Rose Gardening In Late Fall
While the growing season is coming to and end, the winter hibernation season has not yet begun. Some of us just don't know what to do with ourselves or our rose bushes during this period of time.
Because your bushes are not yet in hibernation they still require some attention from you. Water continues to be a prime need, so make sure that the soil around their roots continues to remain moist. Give them a good soaking as need be, but, as always, don't over-water. Water is an important part of your roses' winter survival requirements and properly hydrated roots will help them stay protected when the cold weather arrives.
Stop all pruning and deadheading activity so you do not encourage new growth. You should have stopped applying organics last month, and you don't want to apply any more fertilizer now either. Your goal is to keep your roses healthy while, at the same time, encouraging them to begin the process of going into dormancy.
Continue spraying at least once each month to combat black spot. Spider mites are still active during late autumn so keep your eye out for them. Spritz your blooms and foliage with water whenever you see signs of infestation. Aphids are also active now, so have a bottle of soapy water ready to send them packing. Pick off any diseased leaves and rake away any fallen leaves from your rose beds.
This not only improves the appearance of your garden, it also removes any disease residue which may be still on the leaves. This is also a good time to prepare your new rose holes and rose beds for next year's growing season. They will have time to "mellow" over the winter season and will be ready to accept new bushes in spring.
Begin the process of piling mulch around your more delicate varieties such as "St. Patrick", "Color Magic", "Oklahoma" and "Signature". Your hardier varieties can wait until next month. See our "Winter Gardening" article for mulching tips. You worked hard all season to keep your roses healthy and beautiful. If you did everything right, you were probably rewarded with waves and waves of beautiful blooms. Your hard work is almost over for the year, but don't neglect your roses during these important final months.
Because your bushes are not yet in hibernation they still require some attention from you. Water continues to be a prime need, so make sure that the soil around their roots continues to remain moist. Give them a good soaking as need be, but, as always, don't over-water. Water is an important part of your roses' winter survival requirements and properly hydrated roots will help them stay protected when the cold weather arrives.
Stop all pruning and deadheading activity so you do not encourage new growth. You should have stopped applying organics last month, and you don't want to apply any more fertilizer now either. Your goal is to keep your roses healthy while, at the same time, encouraging them to begin the process of going into dormancy.
Continue spraying at least once each month to combat black spot. Spider mites are still active during late autumn so keep your eye out for them. Spritz your blooms and foliage with water whenever you see signs of infestation. Aphids are also active now, so have a bottle of soapy water ready to send them packing. Pick off any diseased leaves and rake away any fallen leaves from your rose beds.
This not only improves the appearance of your garden, it also removes any disease residue which may be still on the leaves. This is also a good time to prepare your new rose holes and rose beds for next year's growing season. They will have time to "mellow" over the winter season and will be ready to accept new bushes in spring.
Begin the process of piling mulch around your more delicate varieties such as "St. Patrick", "Color Magic", "Oklahoma" and "Signature". Your hardier varieties can wait until next month. See our "Winter Gardening" article for mulching tips. You worked hard all season to keep your roses healthy and beautiful. If you did everything right, you were probably rewarded with waves and waves of beautiful blooms. Your hard work is almost over for the year, but don't neglect your roses during these important final months.
About the Author
Alice is an avid gardener who shares her resources and experience online at http://www.roseblogonline.com.
Read full story at : Gardening Tips
Tuesday, September 26, 2006
September Gardening Tips
Well it is now September, and the mornings are great aren't they? It is now beginning to be the best time to plant trees and shrubs. It is a great time because the above ground temperatures are dropping and the below ground temps are still warm.
This helps plants get a jump on next spring because the roots still develope in the warm soil while the tops slow down in growth. Also, there are less winds and typically more moisture during this time of year, which of course reduces stress on newly planted shrubs and trees. You should be able to plant just about anything, including pansies, (which will last thru next May) mums, winter veggies (starts), most trees and shrubs.
There are a few exceptions: Palm trees might be better planted in the spring and summer, in order to get a good root establishment before the winter sets in. (For the lower elevations of the southwestern U.S. States)
Oleanders may experience some winter kill if planted too late in the season, especially the 1 gallon size. The larger sizes seem to suffer the least winter kill. This is usually for the the first winter, after that they will have even less winter or no winter kill as they age. Using a winterizer fertilizer with plenty of potash will help increase winter hardiness just about all shrubs and trees.
It is recommended for valuable plants that may suffer from winter damage. Use this product before October 30th. Don't forget to use compost, peat moss, or soil builder and root stimulator on all plantings, and make sure plants have adequate water.
This helps plants get a jump on next spring because the roots still develope in the warm soil while the tops slow down in growth. Also, there are less winds and typically more moisture during this time of year, which of course reduces stress on newly planted shrubs and trees. You should be able to plant just about anything, including pansies, (which will last thru next May) mums, winter veggies (starts), most trees and shrubs.
There are a few exceptions: Palm trees might be better planted in the spring and summer, in order to get a good root establishment before the winter sets in. (For the lower elevations of the southwestern U.S. States)
Oleanders may experience some winter kill if planted too late in the season, especially the 1 gallon size. The larger sizes seem to suffer the least winter kill. This is usually for the the first winter, after that they will have even less winter or no winter kill as they age. Using a winterizer fertilizer with plenty of potash will help increase winter hardiness just about all shrubs and trees.
It is recommended for valuable plants that may suffer from winter damage. Use this product before October 30th. Don't forget to use compost, peat moss, or soil builder and root stimulator on all plantings, and make sure plants have adequate water.
About the Author
Gary Guzman Owner of Guzman's Greenhouse and Color your world Nurseries.
Website: http://guzmansgreenhouse.com
email: manager@guzmansgreenhouse.com
More Tips at : Gardening Tips
Wednesday, September 20, 2006
Gardening Tips
Gardens come in different varieties like the plants you find in them. There are several gardening tips that can be used for all type of gardens.
1.Mulching protects your garden topsoil from being blown away. It also provides nutrients as it decomposes and improves the appearance of your gardens. Mulching has other benefits and is one of the most recommended gardening tips by gardeners and farmers alike.
2.Healthy plants are more disease resistant. Plants are like people.
3.Landscaping is a good investment which can double the value of your home. This is one gardening tip that can earn you money.
4. Growing grass on bare ground is an easy way to make your home look better and appreciate in value. This is one gardening tip that promotes earning money while growing grass legally.
5. Aside from looking great in your home, trees also provide some sort of protection from direct sunlight exposure and strong winds.
6. Vines on the walls, fences and overhead structures also would offer some protection and would also look great.
7.Flowers are beautiful, but they are also expensive. Get one that is resistant to many elements. Flowers from your local community already have developed resistance to conditions present in your area.
8.For most gardens plants, their roots go only as deep as 6 inches. Putting fertilizer deeper than that would be a waste of money. Put them shallower as they seep down when the plants are being watered.
9.Earthworms are important to plants. They till and aerate the soil for the roots to breathe. Non-organic fertilizers can kill them. This gardening tip dates back to the old days of gardening.
10. Having several kinds of insects that are beneficial to your garden would be good. These insects can be encouraged to stay by having diverse plants in your garden.
11. Spot spraying weeds with household vinegar, instead of using commercial weed-killers, can eradicate them. This is another environment friendly gardening tip.
12. Avoid putting too much mulch on tree trunks; this would encourage unwanted pests to reside on them.
13. Use plant varieties that are common to your area or have been taken from an area with similar conditions.
14. Be sure to know the plants that are poisonous. If you are intent on growing them, make sure to have the necessary cure available in your household. Take note of this gardening tip, it can save your life.
15. The best time to water plants is during mornings.
16. Before planting a new plant in your garden, you must consider its height and size when it matures. This garden tip can help you save money in the future.
17. Newly transplanted plants may require special attention during its first week. This is to reduce the stress and shock it got during transplantation.
And last but not the least of the gardening tips...
18.Plants are living entities. If you want them to grow in your garden you have to treat them as such. They need to be taken care of. They are like your pets, you look out for them. In return you get that feeling of contentment watching them thrive.
A good way to take care of them is to consider that plants might have some feelings too.
About the author:
Hege Crowton is an expert copywriter.
She is known for doing in-depth research before writing her articles.
Many of her articles are posted on www.submitcontent.com
and she also does a lot of writing for www.CrowSites.com
Copyright 2005 www.Gardeningcrow.com
More Tips at : Gardening Tips
1.Mulching protects your garden topsoil from being blown away. It also provides nutrients as it decomposes and improves the appearance of your gardens. Mulching has other benefits and is one of the most recommended gardening tips by gardeners and farmers alike.
2.Healthy plants are more disease resistant. Plants are like people.
3.Landscaping is a good investment which can double the value of your home. This is one gardening tip that can earn you money.
4. Growing grass on bare ground is an easy way to make your home look better and appreciate in value. This is one gardening tip that promotes earning money while growing grass legally.
5. Aside from looking great in your home, trees also provide some sort of protection from direct sunlight exposure and strong winds.
6. Vines on the walls, fences and overhead structures also would offer some protection and would also look great.
7.Flowers are beautiful, but they are also expensive. Get one that is resistant to many elements. Flowers from your local community already have developed resistance to conditions present in your area.
8.For most gardens plants, their roots go only as deep as 6 inches. Putting fertilizer deeper than that would be a waste of money. Put them shallower as they seep down when the plants are being watered.
9.Earthworms are important to plants. They till and aerate the soil for the roots to breathe. Non-organic fertilizers can kill them. This gardening tip dates back to the old days of gardening.
10. Having several kinds of insects that are beneficial to your garden would be good. These insects can be encouraged to stay by having diverse plants in your garden.
11. Spot spraying weeds with household vinegar, instead of using commercial weed-killers, can eradicate them. This is another environment friendly gardening tip.
12. Avoid putting too much mulch on tree trunks; this would encourage unwanted pests to reside on them.
13. Use plant varieties that are common to your area or have been taken from an area with similar conditions.
14. Be sure to know the plants that are poisonous. If you are intent on growing them, make sure to have the necessary cure available in your household. Take note of this gardening tip, it can save your life.
15. The best time to water plants is during mornings.
16. Before planting a new plant in your garden, you must consider its height and size when it matures. This garden tip can help you save money in the future.
17. Newly transplanted plants may require special attention during its first week. This is to reduce the stress and shock it got during transplantation.
And last but not the least of the gardening tips...
18.Plants are living entities. If you want them to grow in your garden you have to treat them as such. They need to be taken care of. They are like your pets, you look out for them. In return you get that feeling of contentment watching them thrive.
A good way to take care of them is to consider that plants might have some feelings too.
About the author:
Hege Crowton is an expert copywriter.
She is known for doing in-depth research before writing her articles.
Many of her articles are posted on www.submitcontent.com
and she also does a lot of writing for www.CrowSites.com
Copyright 2005 www.Gardeningcrow.com
More Tips at : Gardening Tips
Thursday, September 14, 2006
Gardening Fun With Children
Do you recall your very first plant? Your first garden? Perhaps it was the geranium seeds you planted in a milk carton or Styrofoam cup as part of a class project. Perhaps, if you were lucky, it was your own corner of your parent’s garden, staked out and set up just for the plants that you chose. My own garden memories include experiments with watermelon seeds (under the back porch where no one would step on them – and where, with no sun, they never grew), orange seeds (the ones in the garden never sprouted. The one I started in a paper cup on a window sill still grows in my mother’s back yard) and packets of all sorts of flower seeds.
Instilling a love of gardening in children gives them a lifelong gift on which they can draw – for pleasure, for sustenance and to add creativity and joy to their lives. There are so many garden-related activities and experiments that you can do with a garden. It boggles the mind that so many resources and references to gardening with children concentrate on ‘building a sunflower house’ when there are so many more creative ways to introduce children to the pure fun of gardening.
Packets of seeds that are labeled ‘kid gardens’ are one way to go about it – they do usually contain seeds for plants that grow quickly, at least in grownup terms. For a child, though, ten days is an eternity. Instead, take a trip to the local nursery with your child and let them pick one or two flats of flowers already in bloom. Invest a few dollars in a garden trowel and fork, and help your child transplant the seedlings into his own flower bed. That’s the sort of work/reward ratio that a child understands: one afternoon of digging and planting equals a flower garden. As the weeks go on, you’ll find their interest is maintained because they’re into the FUN part of gardening – watering, picking, and enjoying.
When they’re ready to start from seed, include them in early spring seed starting. Instead of buying plants, let them plant them inside to be ready to transplant in a few weeks. Take a tip from science teachers everywhere – plant several flats in regular trays, but plant one very special ‘demonstrator’. Fill a glass with soil, poke seeds down into the dirt against the side of the glass and put it on a sunny windowsill. Your child will have the fascination of watching what happens underground as his seedlings grow – the seed pod splitting, the roots spreading, and finally, the miracle of the first tiny shoots pressing upward toward the light and heat.
There are other very easy gardening projects that yield quick results for children, projects that have the bonus of being ‘winter-ready’. Cut up a potato, making sure that each chunk contains at least one eye. Plant it in a cup of dirt with the eye facing up – and watch it grow. You can do the same with an onion – just bury the onion in soil with the crown showing. It will only take days for the shoots to turn green and begin growing.
For more fun gardening ideas for kids, pick up a science activity book. You’ll find a world of growing and gardening experiments that children can try, including the ever popular ‘cucumber in a bottle’ trick.
About the Author
This article courtesy of http://www.floral-world.net
More Tips at : Gardening Tips
Monday, September 11, 2006
Gardening for Kids
Children are continually bombarded with advertising for fast food and unhealthy treats. One of the most important lessons you can teach them is how to tend and grow their own food from the garden.
There are plenty of quick and easy projects that the children can get involved in. The projects will teach them about nutrition, nature, recycling and organic gardening. That's a good outcome!
The no dig garden is a particularly good project for children because the garden can be built and planted in just a couple of hours. You do not have to prepare the garden for weeks in advance, as with other growing methods. There are detailed instructions for building a no dig garden on my website (www.no-dig-vegetablegarden.com). If a full on garden seems too ambitious at the start, try something simpler.
Encourage your children to nurture their little garden, which ever project you choose. It's a great way to teach them practical skills and fill them forever with the wonder of nature.
About the Author
Judy Williams (www.no-dig-vegetablegarden.com) aspires to become a fulltime earth mother goddess. This site acts as a primer for all vegetable gardening aspects covering topics like how to build a garden, nurture seedlings, container gardening and composting.
More Tips at : Gardening Tips
Wednesday, August 30, 2006
Gardening For Senior Citizens
Are you in a wheelchair, and long to dig in the dirt and create flowering beauty and grow far more zucchini than you can give away? Or are your knees just starting to age and even though you've loved gardening all your life, you're having more trouble getting up and down and are afraid you'll have to give up gardening altogether? Did you botch the last pruning of your roses because of the worsening arthritis in your hands?
Welcome to the world of the physically challenged gardener.
Don't despair. Adapt!
There's plenty of help out there in the form of advice, tools, raised flower beds and other specialized equipment.A Google search of "Disabled gardening tools" leads to 125 websites with specific helpful adaptive equipment. "Disabled gardening" gives a whopping 873,000 results where you can find advice and "handicapped gardening" yields 111,000. Let those arthritic fingers do your walking!
Problem: "The ground is just too far down there!"
Think about doing your gardening while sitting on a chair, instead of on the ground, squatting or bending over. The most obvious solution is to build raised flower beds and scatter containers throughout your garden area. Buy cheap plastic outdoor chairs and place one beside each mini-garden so you don't have to drag or carry when it's time to weed. You can just sit down and enjoy the feel of moist earth beneath your fingers and breathe in the heavenly smell of freshly applied fish emulsion.
If you hang a cup holder on the edge of your container, you can even have the luxury of tea or coffee with your weeds. Maybe the fish emulsion should wait.
Don't think about what you've lost now that you can't crawl around weeding the perennial border; teach your grandchild or a neighborhood kid the joy to be found doing that task ... you've just discovered a new adventure in gardening. The good news is that you may find whole different special areas of your yard where you can stick a mini-garden.
Get creative. Put a beautiful container near your front door and plant wonderfully scented flowers to greet your guests ... or perhaps a nice cherry tomato plant they can steal from on their way to ring your doorbell. Put a waist high herb garden right outside your kitchen door and add an area in it for your favorite cut flowers.
When you're deciding where to locate the raised bed or container, be sure to remember physically demanding practicalities like dragging a heavy hose to water it. Think and plan a low energy solution for what you'll do with the compost material.
Problem: "My painful hands don't have the strength for ..."
You can get tools which extend your arms to reach the ground level flower bed from a sitting position. Several manufacturers make specially tools with light weight handles designed to keep the wrist and hand in a stress-free position and to provide a firmer grip. Small, light rakes, hoes, etc. like this can work wonders.
Think ratchet pruner, rachet lopping shears ... let the laws of physics give your hands a hand. You'll be amazed when you look at the tools available. Pull difficult weeds by stepping on a lever.
Problem: "I get so tired so quickly."
Hey, the weeds didn't grow all at once; you don't have to pull them all at once. Pace yourself. Find ways to make gardening something you do while you sit and drink a cup of tea and listen to the birds, rather than a work chore you slave away at for a full afternoon. Pull one weed from the scented garden near your front door on your way out and another weed on the way in. Plant parsley in your kitchen door herb garden while your toast is toasting and the coffee is dripping.
Buy and plant 3 packs of flowers instead of a whole flat. Take a nice aerobic walk around your yard, stopping at a different container for 5 minutes "conversation" with your plants on each cycle, then go back inside and plop on the recliner. You'll be amazed at how much gets done in these mini-work sessions. Your heart will love you, too.
Remember, one of the nice things about flowers is they don't have anything to prove. We can all learn a lesson from them.
About the Author
This article provided courtesy of http://www.floral-shopper.com
More Tips at : Gardening Tips
Thursday, August 24, 2006
Enjoy Working Your Garden With The Right Gardening Tool
Nearly every gardener has some type of gardening tools. In fact, it is nearly impossible to have a garden without the necessary garden tools. What kind of gardening equipment you use will obviously depend on the size and extent of your garden, what you are able to handle, if you want to spend a lot of time in your garden or get it done quickly, and finally, how much money you are willing to spend.
While many gardeners do not have expensive or high-tech gardening tools, all of them have some type of gardening equipment for cultivating. Tools for cultivating can include both hand held tools and power tools. What kind you buy depends on how serious of a gardener you are. Hand tools include your everyday items like shovels, spading forks, rakes, trowels, and diggers. These can all be used to get a garden ready for planting and are relatively easy and do not require much strength to use. Other tools include a wheel cultivator, pickax, and mattock.
While power tools are a little more expensive than hand tools, they really cut down on the hard labor. The most essential piece of gardening equipment is undoubtedly the tiller. The tiller will break up the ground and get it ready for planting, chop up any debris, and help mix in fertilizer and compost. If you do not want to spend the money on a tiller, you can hire someone or rent a tiller. Other power tools that are very popular include chippers and garden shredders.
If you have shrubs, hedges, or small trees in your yard, pruning tools are a vital piece of gardening equipment. Pruning shears are good for branches about ¾” in diameter, while lopping shears can handle branches from a half inch up to about 2 inches. Pole pruners are on a pole and can reach branches about 15 feet above ground. Hedge shears and pruning saws are both larger, more heavy-duty pruning tools for the serious gardener.
Since your plants must be watered in order to survive, and lets face it, it doesn't rain whenever we want it to, gardening equipment for watering is a must have. The one thing you cannot get along without is a water hose, everything after that is optional. Many gardeners use sprinklers or drip irrigation hose. There are even timers you can purchase for sprinklers or drip hoses, if you are willing to drop the extra cash.
Gardening without gardening tools would be a nightmare. Sure there are some people who enjoy getting a little dirty while they plant their flowers, but even those types of people have the most basic of gardening tools, like a rake or a hoe. Gardening equipment is a part of gardening, as important as the dirt and the seeds.
While many gardeners do not have expensive or high-tech gardening tools, all of them have some type of gardening equipment for cultivating. Tools for cultivating can include both hand held tools and power tools. What kind you buy depends on how serious of a gardener you are. Hand tools include your everyday items like shovels, spading forks, rakes, trowels, and diggers. These can all be used to get a garden ready for planting and are relatively easy and do not require much strength to use. Other tools include a wheel cultivator, pickax, and mattock.
While power tools are a little more expensive than hand tools, they really cut down on the hard labor. The most essential piece of gardening equipment is undoubtedly the tiller. The tiller will break up the ground and get it ready for planting, chop up any debris, and help mix in fertilizer and compost. If you do not want to spend the money on a tiller, you can hire someone or rent a tiller. Other power tools that are very popular include chippers and garden shredders.
If you have shrubs, hedges, or small trees in your yard, pruning tools are a vital piece of gardening equipment. Pruning shears are good for branches about ¾” in diameter, while lopping shears can handle branches from a half inch up to about 2 inches. Pole pruners are on a pole and can reach branches about 15 feet above ground. Hedge shears and pruning saws are both larger, more heavy-duty pruning tools for the serious gardener.
Since your plants must be watered in order to survive, and lets face it, it doesn't rain whenever we want it to, gardening equipment for watering is a must have. The one thing you cannot get along without is a water hose, everything after that is optional. Many gardeners use sprinklers or drip irrigation hose. There are even timers you can purchase for sprinklers or drip hoses, if you are willing to drop the extra cash.
Gardening without gardening tools would be a nightmare. Sure there are some people who enjoy getting a little dirty while they plant their flowers, but even those types of people have the most basic of gardening tools, like a rake or a hoe. Gardening equipment is a part of gardening, as important as the dirt and the seeds.
About the Author: For more information about garden tools, visit http://www.gardentoolinfocenter.com
More Tips at : Gardening Tips
Monday, May 22, 2006
Herb Gardening Indoors
Here are some tips for herb gardening indoors that will simulate the conditions in an outside garden. For Herb gardening indoors the growing climates need to be pretty much the same as the conditions outside.
Get your herb plants from a good garden center nursery who will have plenty of garden advice to help you with your inside garden. You will need some garden equipment like a small digging garden tool, garden gloves, organic fertilizer and some small gardening containers. You probably already have most of these garden supplies in your garden shed.Soil is the most important aspect of growing herbs indoors.
Use only top grade potting soil with an organic fertilizer mixed in. If you think it is too fine a soil, use a little perlite. Fertilize while potting the herbs and they should be happy until spring. If you have an herb that is not growing vigorously add a little organic liquid fertilizer to the water. When you go to transplant the herb, go one inch up in the size of the gardening container. If the plant is in a two inch pot, go to a three inch gardening container. Leave the roots alone and be careful not to bruise the stem.
Don't plant oreganos, mints, lemon balm or bee balm with other plants because they will overgrow everything. Pot these herbs in a garden container all their own. Some people swear that you must put garden stones in the bottom of the gardening container, but I dispute that opinion. I feel that the garden stones take valuable space away from the herb roots.When it comes to light, all herbs must get 4 to 6 hours of sunlight a day on your window sill. If your window doesn't supply that much light then purchase garden grow lights and hang them three inches above the plants. If you live in a very hot climate shade the herbs during the hottest periods.
If you live in a very cold climate keep the herbs away from the cold glass panes.When it comes to watering, don't let the herbs dry out but don't drown them either. An inexpensive water meter from your garden center nursery will help with this important step in growing your herbs. Always use room temperature water so as not to shock the herb's roots.If you follow all of these steps you will have a healthy herb garden all winter.This article may be distributed freely on your website, in your ezines and in your eBooks, as long as this entire article, copyright notice, links and the resource box are unchanged. Copyright � 2005 Mary Hanna. All Rights reserved.
About the Author: Mary Hanna is an aspiring herbalist who lives full time in Central Florida which allows her to garden and grow herbs inside and outside year round.
Herb Gardening Indoors By Mary Hanna
Copyright 2005 Contact: mary@gardeninglandscapingtips.com or visit her garden site http://www.gardeninglandscapingtips.com/This article was taken from : http://gardeningtips.infoplugin.com
Get your herb plants from a good garden center nursery who will have plenty of garden advice to help you with your inside garden. You will need some garden equipment like a small digging garden tool, garden gloves, organic fertilizer and some small gardening containers. You probably already have most of these garden supplies in your garden shed.Soil is the most important aspect of growing herbs indoors.
Use only top grade potting soil with an organic fertilizer mixed in. If you think it is too fine a soil, use a little perlite. Fertilize while potting the herbs and they should be happy until spring. If you have an herb that is not growing vigorously add a little organic liquid fertilizer to the water. When you go to transplant the herb, go one inch up in the size of the gardening container. If the plant is in a two inch pot, go to a three inch gardening container. Leave the roots alone and be careful not to bruise the stem.
Don't plant oreganos, mints, lemon balm or bee balm with other plants because they will overgrow everything. Pot these herbs in a garden container all their own. Some people swear that you must put garden stones in the bottom of the gardening container, but I dispute that opinion. I feel that the garden stones take valuable space away from the herb roots.When it comes to light, all herbs must get 4 to 6 hours of sunlight a day on your window sill. If your window doesn't supply that much light then purchase garden grow lights and hang them three inches above the plants. If you live in a very hot climate shade the herbs during the hottest periods.
If you live in a very cold climate keep the herbs away from the cold glass panes.When it comes to watering, don't let the herbs dry out but don't drown them either. An inexpensive water meter from your garden center nursery will help with this important step in growing your herbs. Always use room temperature water so as not to shock the herb's roots.If you follow all of these steps you will have a healthy herb garden all winter.This article may be distributed freely on your website, in your ezines and in your eBooks, as long as this entire article, copyright notice, links and the resource box are unchanged. Copyright � 2005 Mary Hanna. All Rights reserved.
About the Author: Mary Hanna is an aspiring herbalist who lives full time in Central Florida which allows her to garden and grow herbs inside and outside year round.
Herb Gardening Indoors By Mary Hanna
Copyright 2005 Contact: mary@gardeninglandscapingtips.com or visit her garden site http://www.gardeninglandscapingtips.com/This article was taken from : http://gardeningtips.infoplugin.com

Monday, May 15, 2006
A Little Known Secret to Successful Outdoor Gardening
Leonard Mutch
A Little Known Secret to Successful Outdoor Gardening ......Pruning
Outdoor gardening is so much easier when you know how.
Outdoor gardening is much more enjoyable when you know a few secrets.
Much of the enjoyment of outdoor gardening comes from the care and proper maintenance of the garden..
Not many plants will look their best without some help, and pruning is one of these techniques considered essential to outdoor gardening if plants are to flower and fruit well, and to keep pests and diseases at bay.
For those inexperienced in outdoor gardening, pruning can often be a reason for concern.
Questions may arise, such as when is the best time to prune, and how, and where.
We prune our trees and shrubs mainly to increase flowering and fruiting, to control diseases, or to change the size or shape of the plant.
Some shrubs such as Forsythia need an annual prune of their older wood to help maintain vigor and to produce new flowering shoots.
These new shoots are produced from the base of the plant.
If Forsythia was left un pruned it could soon become overcrowded, allowing little room for new shoots to grow and flower.
I recommend that after flowering each year you cut out a good quarter to one third of the old wood around the base of the shrub.
A number of shrubs can be encouraged through pruning to develop larger foliage with no flowers.
This is usually done in late winter or early spring.
The shrub is either cut back to the ground, or cut back very hard whilst removing dead wood and twigs.
Some trees are suitable for this type of pruning, and this can totally change the appearance of these plants.
Ornamental fruit trees will produce much more flowers and fruit when pruned correctly.
As a rough guide for outdoor gardening the plants that flower early in the season should be pruned as soon as flowering has finished,whilst late flowering shrubs can be done at the beginning of the growing season.
Many shrubs are grown for the color of their stems, and will need to be pruned at frequent intervals if the color is to be kept.
A technique called "coppicing" where the shrub is pruned hard close to the ground is usually involved.
Coppicing is also used for the production of wood suitable for fencing.
In outdoor gardening however, it is used most often to stimulate fresh new growth in the colorful stems of trees and shrubs.
The shape of trees and shrubs in the outdoor garden can be changed by pruning and crossing branches that are close together.
The object here is to construct a natural open shape so that air can circulate freely.
If some of your older shrubs are getting a bit woody and ugly you could try cutting the plant back hard whilst trying to keep some leaves on the lower branches, before deciding to pull them up.
It's worth giving the plant a feed and mulch at this time too.
What pruning tools will you need for outdoor gardening?
For outdoor gardening you will need secateurs for soft shoots and small branches, or loppers for branches that are too thick to be cut with secateurs, and a saw for even bigger branches.
Always use good quality tools and make sure they are sharp.
It is essential to the health of your plants that you prune correctly.
Cut out all diseased, weak and dead growth.
Always cut back to healthy wood, free from the staining of infected tissue.
Generally when pruning cuts are made on trees and shrubs it should be made to a bud, which will then grow away without leaving a dead stump.
You should choose a bud that is facing the direction you want the branch to grow away to, then make a slanting cut about 2 inches above the bud.
If the plant has opposing buds, then cut straight across.
A good tip for creating cleaner, easier cuts on lighter stems and branches with secateurs is to hold the stem in your free hand and bend it slightly with light pressure before cutting.
To remove a branch from a shrub or tree, you first need to cut the branch back to about a foot from the trunk. This will help to prevent the branch tearing.
Don't however cut the remaining stub flush with the trunk, but leave a small swelling which can heal on its own.
Pare off ragged parts left on sawn surfaces.
Collect all your prunings and compost them if soft and healthy, but burn them if woody or diseased.
Enjoy your outdoor gardening by pruning successfully.
Make the right cut to improve your outdoor gardening skills.
A Little Known Secret to Successful Outdoor Gardening ......Pruning
Outdoor gardening is so much easier when you know how.
Outdoor gardening is much more enjoyable when you know a few secrets.
Much of the enjoyment of outdoor gardening comes from the care and proper maintenance of the garden..
Not many plants will look their best without some help, and pruning is one of these techniques considered essential to outdoor gardening if plants are to flower and fruit well, and to keep pests and diseases at bay.
For those inexperienced in outdoor gardening, pruning can often be a reason for concern.
Questions may arise, such as when is the best time to prune, and how, and where.
We prune our trees and shrubs mainly to increase flowering and fruiting, to control diseases, or to change the size or shape of the plant.
Some shrubs such as Forsythia need an annual prune of their older wood to help maintain vigor and to produce new flowering shoots.
These new shoots are produced from the base of the plant.
If Forsythia was left un pruned it could soon become overcrowded, allowing little room for new shoots to grow and flower.
I recommend that after flowering each year you cut out a good quarter to one third of the old wood around the base of the shrub.
A number of shrubs can be encouraged through pruning to develop larger foliage with no flowers.
This is usually done in late winter or early spring.
The shrub is either cut back to the ground, or cut back very hard whilst removing dead wood and twigs.
Some trees are suitable for this type of pruning, and this can totally change the appearance of these plants.
Ornamental fruit trees will produce much more flowers and fruit when pruned correctly.
As a rough guide for outdoor gardening the plants that flower early in the season should be pruned as soon as flowering has finished,whilst late flowering shrubs can be done at the beginning of the growing season.
Many shrubs are grown for the color of their stems, and will need to be pruned at frequent intervals if the color is to be kept.
A technique called "coppicing" where the shrub is pruned hard close to the ground is usually involved.
Coppicing is also used for the production of wood suitable for fencing.
In outdoor gardening however, it is used most often to stimulate fresh new growth in the colorful stems of trees and shrubs.
The shape of trees and shrubs in the outdoor garden can be changed by pruning and crossing branches that are close together.
The object here is to construct a natural open shape so that air can circulate freely.
If some of your older shrubs are getting a bit woody and ugly you could try cutting the plant back hard whilst trying to keep some leaves on the lower branches, before deciding to pull them up.
It's worth giving the plant a feed and mulch at this time too.
What pruning tools will you need for outdoor gardening?
For outdoor gardening you will need secateurs for soft shoots and small branches, or loppers for branches that are too thick to be cut with secateurs, and a saw for even bigger branches.
Always use good quality tools and make sure they are sharp.
It is essential to the health of your plants that you prune correctly.
Cut out all diseased, weak and dead growth.
Always cut back to healthy wood, free from the staining of infected tissue.
Generally when pruning cuts are made on trees and shrubs it should be made to a bud, which will then grow away without leaving a dead stump.
You should choose a bud that is facing the direction you want the branch to grow away to, then make a slanting cut about 2 inches above the bud.
If the plant has opposing buds, then cut straight across.
A good tip for creating cleaner, easier cuts on lighter stems and branches with secateurs is to hold the stem in your free hand and bend it slightly with light pressure before cutting.
To remove a branch from a shrub or tree, you first need to cut the branch back to about a foot from the trunk. This will help to prevent the branch tearing.
Don't however cut the remaining stub flush with the trunk, but leave a small swelling which can heal on its own.
Pare off ragged parts left on sawn surfaces.
Collect all your prunings and compost them if soft and healthy, but burn them if woody or diseased.
Enjoy your outdoor gardening by pruning successfully.
Make the right cut to improve your outdoor gardening skills.
About the Author
Leonard Mutch makes it easy to improve your gardening skills. Subscribe now to his monthly newsletter for tips and savings. Visit this site:
http://www.gardenandplantcenter.com
This acticles was taken from : http://gardeningtips.infoplugin.com

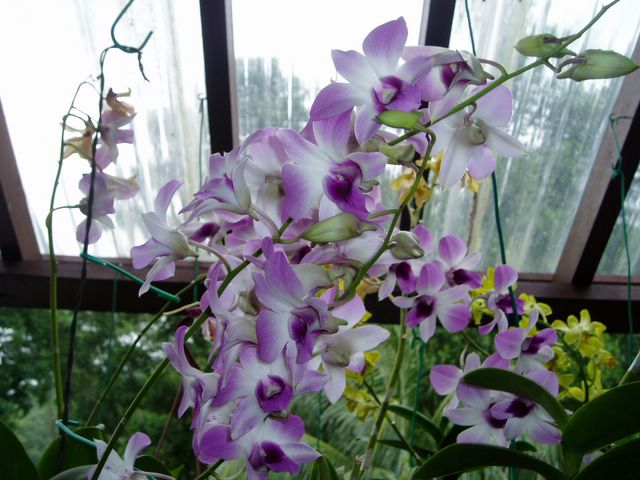

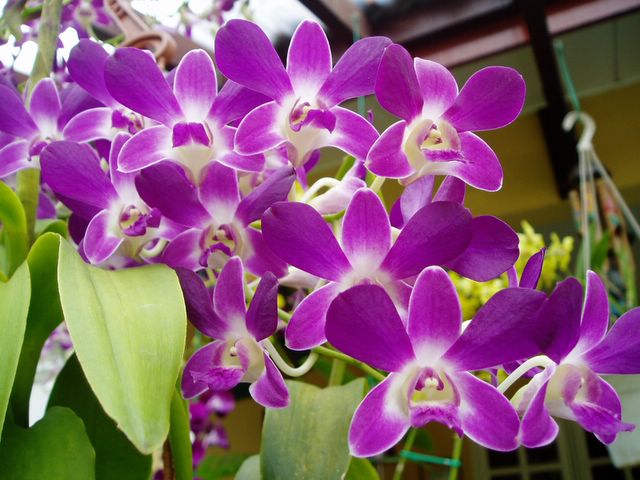
Subscribe to:
Posts (Atom)